Lee Ford’s blogpost on how to create a Teams team through Forms/Flow/Graph inspired me to take a closer look at the possibilities. I wanted to trigger an Azure Automation Runbook through a Form/Flow. I still wanted to use Graph API in the runbook. You may ask why? I think its easier to have an overview and update code/requests in a Runbook rather than small text fields in a Flow. In Azure Automation you also have version control for your code.
At first, I went down the rabbit hole and looked at using the Azure Rest API. Just finding the API link was complicated. There were even different version numbers. After some trial and error, I did a new Google search and stumbled upon Sarah Lean’s blogpost on how to trigger an Azure Automation Runbook with Flow. Now I had what I needed.
First of all, we will need to have an Azure application to authenticate trough when doing Graph API requests.
Go to portal.azure.com and select “All Services”.

Search for and select “App Registrations”.

Open the preview experience.

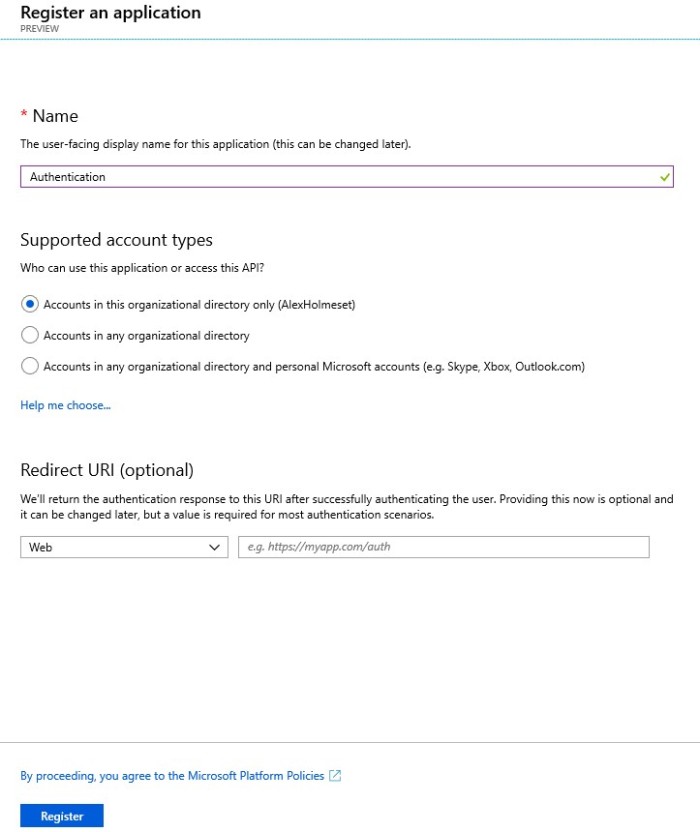
Press “New registration”.

Fill out the form like this and press “Register”.
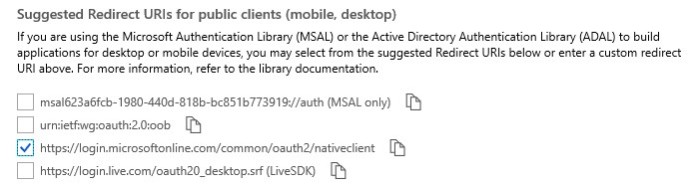
Take note of Client ID for use in the script later on. Press “Add a Redirect URI”.

Select this URL and press “Save”.
Go to “API Permissions” and press “Add a Permission”.

Select “Microsoft Graph”.

Here I would choose “Application Permissions”. This because I don’t want to rely on a user object to authenticate against Azure AD with Graph API. This way we can also use an application secret instead of a password.

For creating a team and adding the requester as a owner, you will need these two permissions. Press “Add permissions”.

Press “Grant admin consent for …..”.

Press “Yes”.

Go to “Certificates & secrets”.
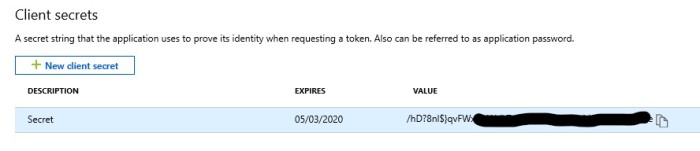
Press “New client secret”, enter description and press “Add”.

Copy the value of the secret.
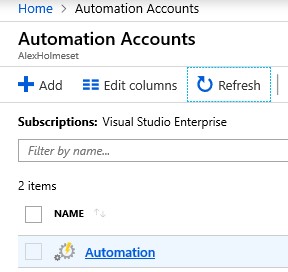
Now we need to set up our Runbook in Azure Automation, so open “All services” and search for “Automation Accounts” and press it.

Press “Add”.

Give your Automation Account a name. Select Subscription, Resource group and Location.
Set “Create Azure Run As account” to Yes.. Press “Create”.

Press “Refresh” and open your newly created automation account.
Go to “Variables” and press “Add a variable”. Here we are going to store our application secret as an encrypted variable. Fill out and press “Create”.

Go to “Runbooks” and press “Create a runbook”.
Give it a name, select PowerShell as type and press “Create”.

After pressing “Create” you get redirected into edit of your runbook.
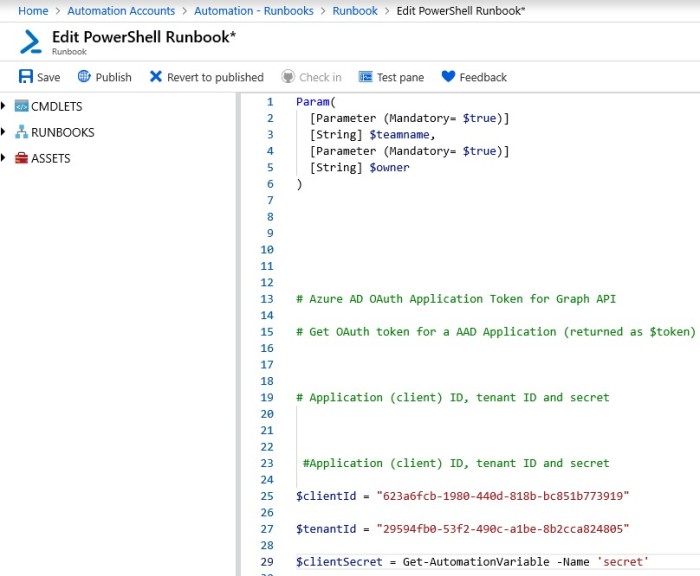
Copy the script under into your runbook editor.
| Param( | |
| [Parameter (Mandatory= $true)] | |
| [String] $teamname, | |
| [Parameter (Mandatory= $true)] | |
| [String] $owner | |
| ) | |
| # Azure AD OAuth Application Token for Graph API | |
| # Get OAuth token for a AAD Application (returned as $token) | |
| # Application (client) ID, tenant ID and secret | |
| #Application (client) ID, tenant ID and secret | |
| $clientId = "623a6fcb-1980-440d-818b-bc851b773919" | |
| $tenantId = "29594fb0-53f2-490c-a1be-8b2cca824805" | |
| $clientSecret = Get-AutomationVariable -Name 'clientsecret' | |
| # Contruct URI | |
| $uri = "https://login.microsoftonline.com/$tenantId/oauth2/v2.0/token" | |
| # Construct Body | |
| $body1 = @{ | |
| client_id = $clientId | |
| scope = "https://graph.microsoft.com/.default" | |
| client_secret = $clientSecret | |
| grant_type = "client_credentials" | |
| } | |
| # Get OAuth 2.0 Token | |
| $tokenRequest = Invoke-WebRequest -Method Post -Uri $uri -ContentType "application/x-www-form-urlencoded" -Body $body1 -UseBasicParsing | |
| $token = ($tokenRequest.Content | ConvertFrom-Json).access_token | |
| #Get ID of team requester and set as owner. | |
| $uri = 'https://graph.microsoft.com/beta/users/'+"$owner"+'?$select=id' | |
| $method = "GET" | |
| $query = Invoke-WebRequest -Method $method -Uri $uri -ContentType "application/json" -Headers @{Authorization = "Bearer $token"} -ErrorAction Stop -UseBasicParsing | |
| $ownerID = ($query.content | ConvertFrom-Json).id | |
| # Specify the URI to call and method | |
| $uri = "https://graph.microsoft.com/beta/teams" | |
| $method = "POST" | |
| $body = @" | |
| { | |
| "[email protected]": "https://graph.microsoft.com/beta/teamsTemplates/standard", | |
| "displayName": "$teamname", | |
| "description": "My Sample Team’s Description", | |
| "[email protected]": [ | |
| "https://graph.microsoft.com/beta/users('$ownerID')" | |
| ] | |
| } | |
| "@ | |
| # Run Graph API query | |
| $query = Invoke-WebRequest -Method $method -Uri $uri -ContentType "application/json" -Body $body -Headers @{Authorization = "Bearer $token"} -ErrorAction Stop -UseBasicParsing |
Here you see two parameters we need and that we enter client id, tenant id and get the client secret.
Press “Save” and “Publish”.
Go back into the editor of your runbook and press “Test pane”.
Now we are going to confirm that the script is working as it should.
Enter a team name and the UPN of a user.
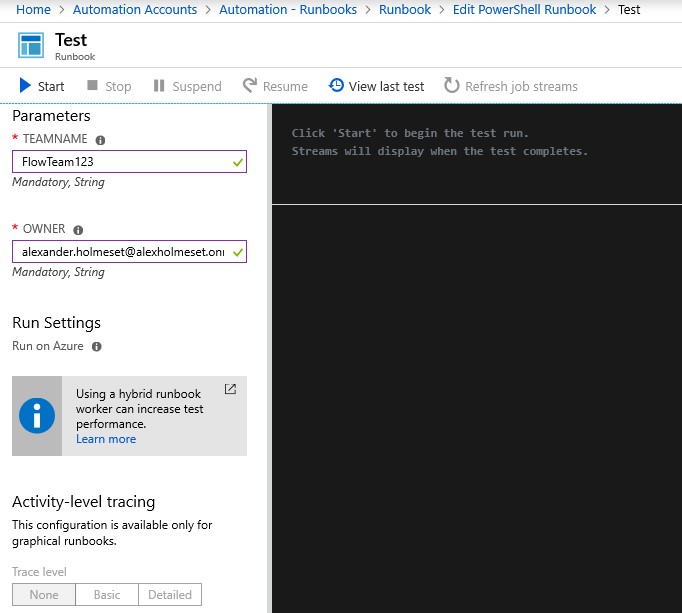
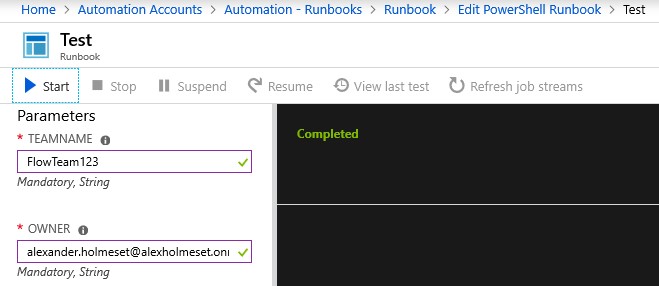
Press “Start”. When you see the green text “Completed”, then everything should be OK. To be sure, you could log on to Teams and see if the team was created.
Now we need to create the Form to receive the request from, so go to https://forms.office.com/Pages/DesignPage.aspx.
Create a new form.

Give the form a name and create a text field with the name Team name that is set to required. Press “Share” and copy the URL for the form so you have it when testing the flow later on.

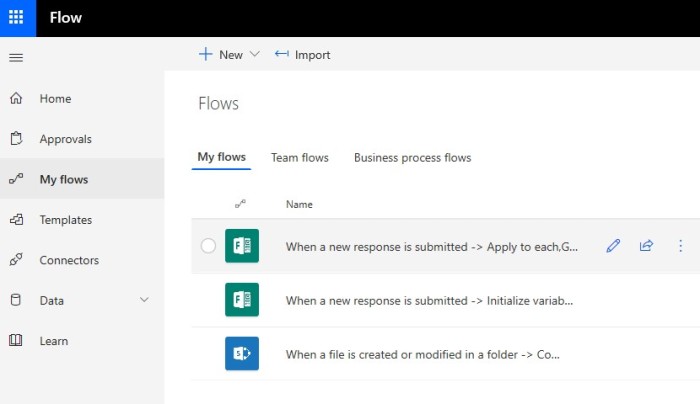
Go to https://flow.microsoft.com and after logging in go to “My flows”.
Press “New” and select “Create from blank”.
Press “Create from blank”.

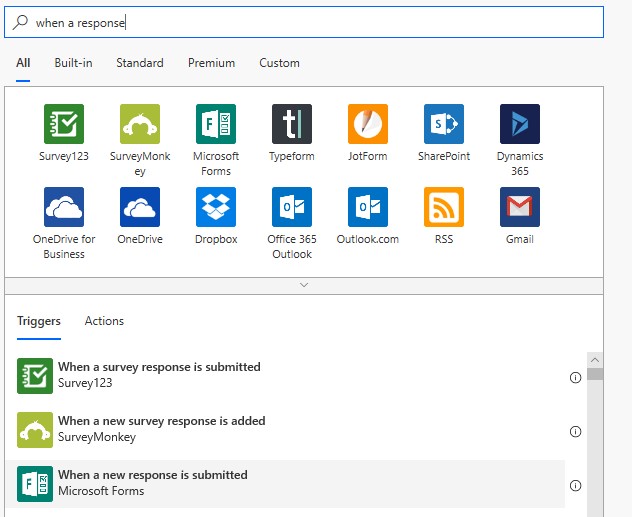
Search for “When a new response is submitted” and select the Microsoft Forms trigger.
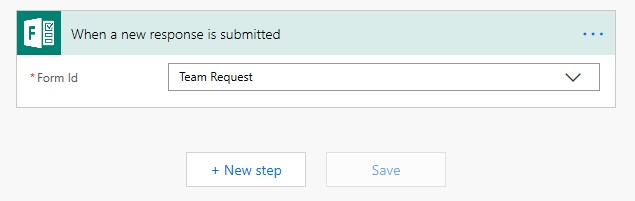
Select the Form you created and press “New step”.
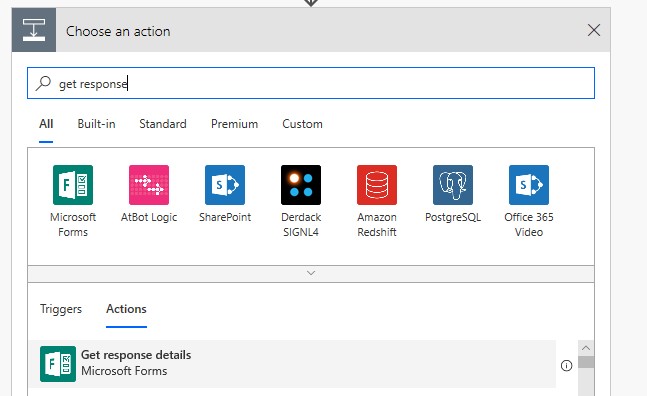
Select “Get response details”.
Select Form Id and set Response Id to “List of response notifications Reponse Id”.

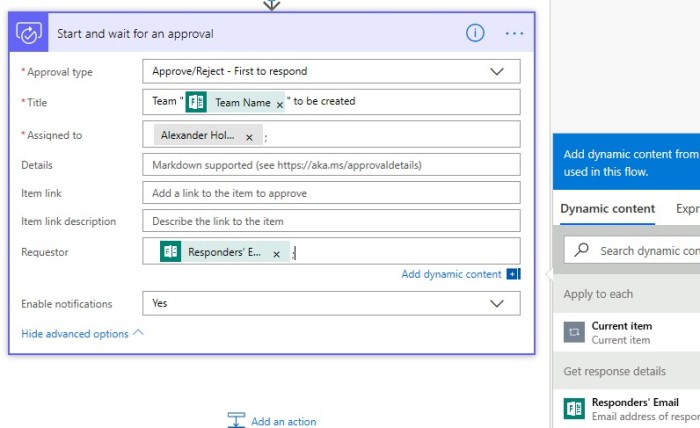
Press “Add an action” and select “Approval -> Start and wait for an approval”.

Set it up like this:
Press “Add an action” and select Condition. Fill out like this:

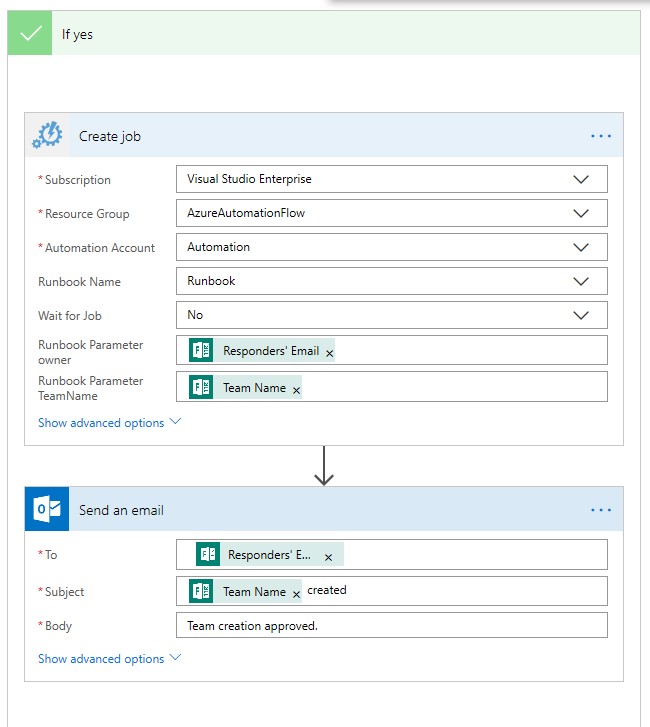
Under “If yes”. Select “Create job” (Azure Automation) fill out and press “Add an action”. Select “Send an email” and fill out.
Under “If no” you add an email response like this:

Save the Flow and press “Test” in the upper right corner.
Select “I’ll perform the trigger action” and press “Save & Test”.

Go to your Form, fill out and submit.
Now you should have received an email where you are asked to approve the team creation.
Press “Approve” and then “Submit”.
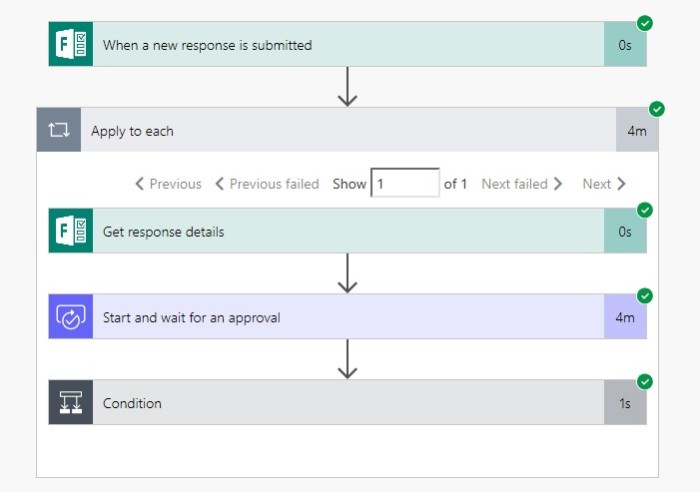
Go back to your Flow test.
If everything went well, it should look like this:
Now you have automated the creation of teams through Forms/Flow/AzureAutomation/GraphAPI. This way you can ease the workload of your IT department and let a manager or a similar role decide on which teams are created.

[…] To read more about registering your own Azure application you can see the steps in this blog post: Trigger Azure Automation with a Teams team request Form! […]
LikeLike
In the “create job” action I’m not seeing the two defined “mandatory” variables as defined in the Azure runbook. All I’m seeing is runbook parameter. Any ideas?
LikeLiked by 1 person
When you try to testrun the runbook in azure automation, do you get the mandatory variables then?
LikeLike
They are present in the runbook on the left hand window before a test run yes.
LikeLike
So it appears i failed to publish my runbook, most likely my issue here. Thank you for replying though! Can’t wait to expand on this idea with more fields!
LikeLike
Ah, forgot about that, good that you figured it out. If any more questions feel free to DM me on Twitter @alexholmeset
LikeLike
[…] What you need to do now is to create a Azure Application with the CallRecords.Read.All Application rights to be able to authenticate against Graph API. You will also create an application secret. How to do these two things, you can read about in this article: Trigger Azure Automation with a Teams team request Form! […]
LikeLike
[…] Trigger Azure Automation with a Teams team request Form! | A blog about automation and technologies … […]
LikeLike