
This blog post is my experience using these two methods and is also a compressed version of them:
https://docs.microsoft.com/en-us/microsoft-365/compliance/export-search-results?view=o365-worldwide
https://docs.microsoft.com/en-us/microsoft-365/compliance/use-network-upload-to-import-pst-files?view=o365-worldwide
The question is, do you always need to use a 3rd party tools when doing migrations? Well, at least now you have a free alternative with out-of-the-box tools from Microsoft.
Update: The reason I’m not using Cross Tenant Migration is that this requires the mailbox in the destination to have Mailuser status. If the mailboxes already have been used and provisioned, they have the status Mailbox. This method also breaks calendar invites, so you can update them/do changes to them after they are imported in the new tenant.
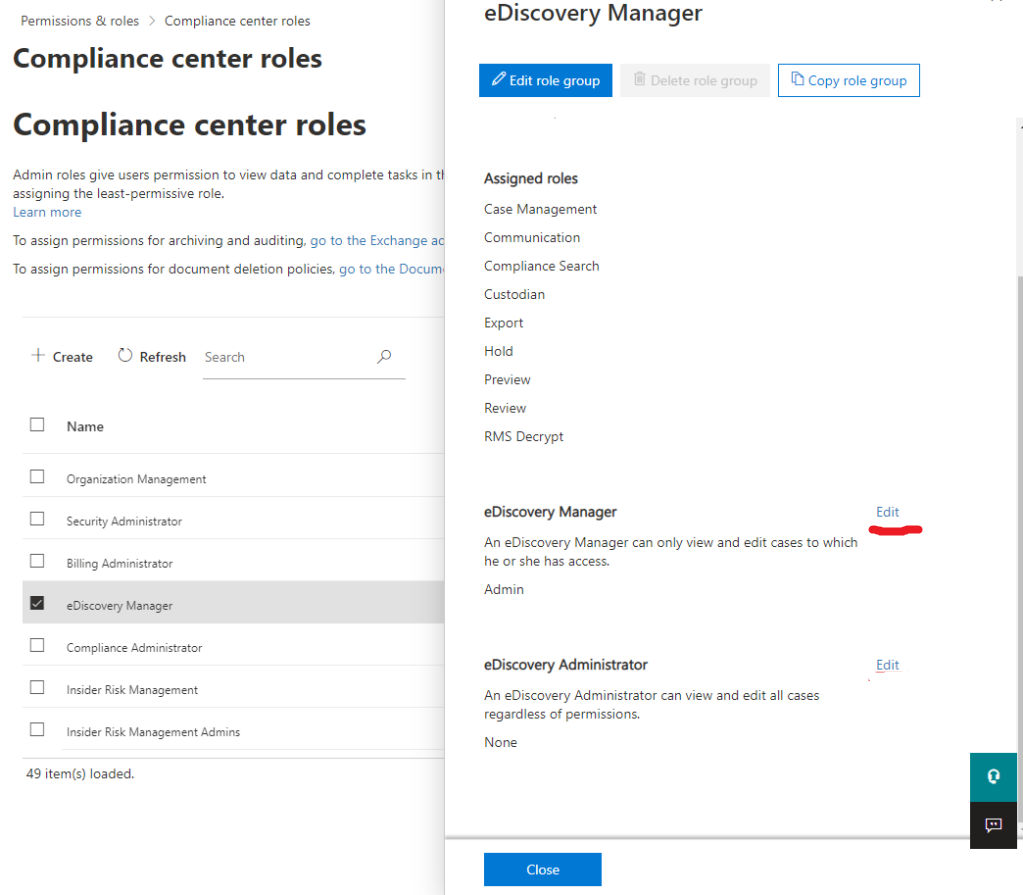
First of all, you need to set up the export of PST files in the source tenant. This is done through a compliance search. To do this you need to have the Export management role, which is assigned to the eDisocvery Manager role.
Go to the Compliance Center Roles menu: https://compliance.microsoft.com/compliancecenterpermissions
Select eDisovery Manager and click edit.
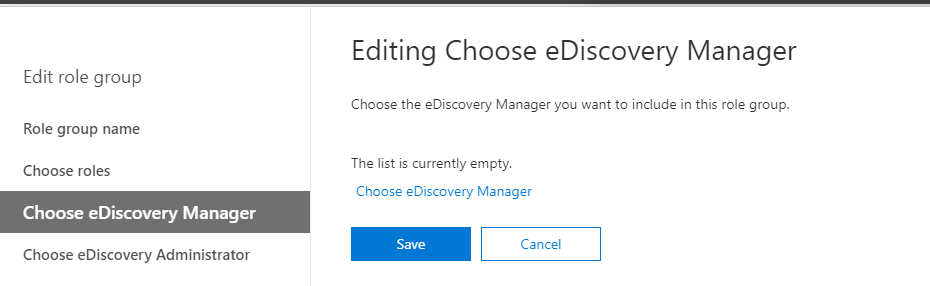
Click Choose eDiscovery Manager.
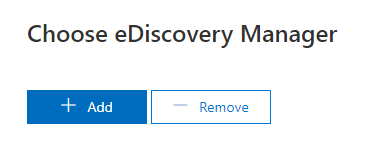
Click Add.
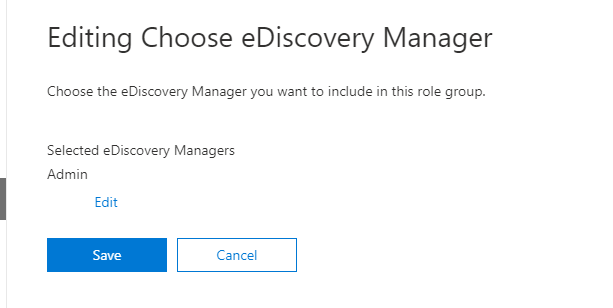
Search for and select the user you want to add to the role, then click Add.

Click Done.

Click Save.
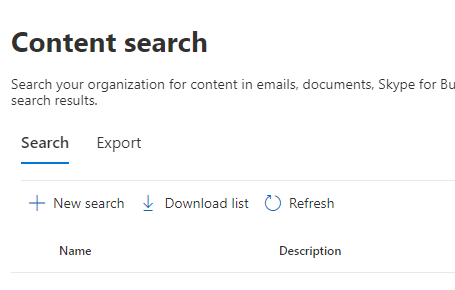
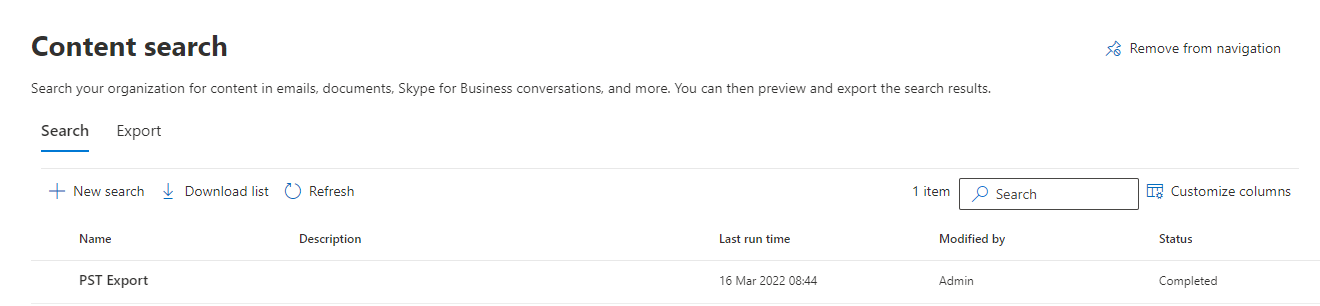
Go to the Content search menu:
https://compliance.microsoft.com/contentsearchv2?viewid=search
Click New search.
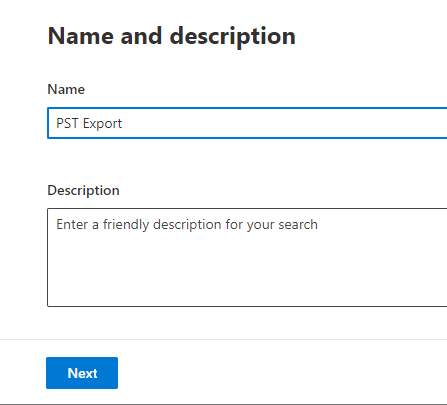
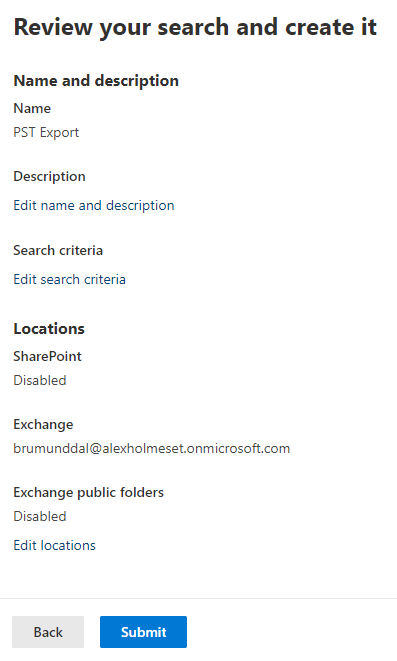
Give the search a name, and click Next.
Click the toggle switch for Exchange mailboxes so it says On, and click “Choose users, groups or teams”.
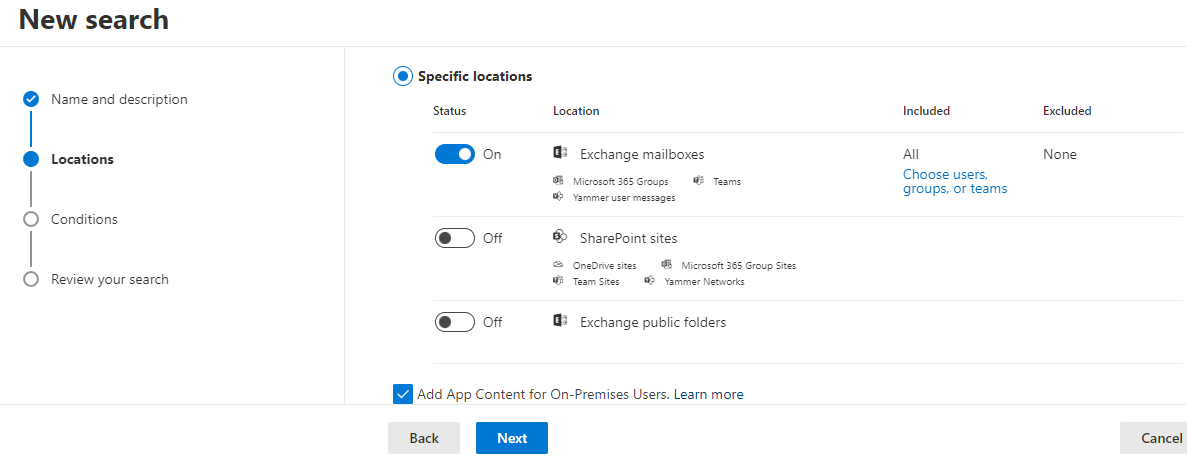
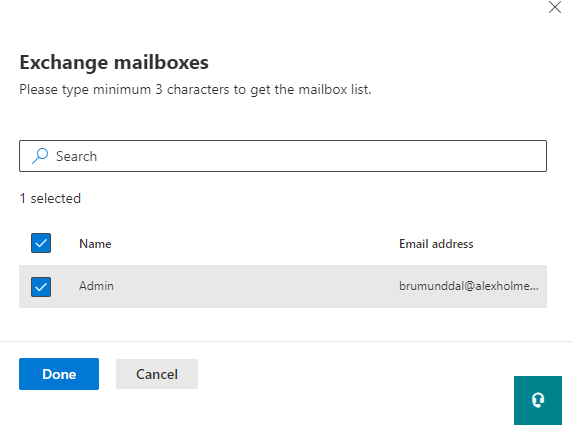
For this blog post, I’m going to select a single user, but you can also select a group containing all the users you want to export mailboxes for. Click Done after selecting the user.
Click Next.

If you want the whole mailbox exported, don’t make any selections here, just click Next.
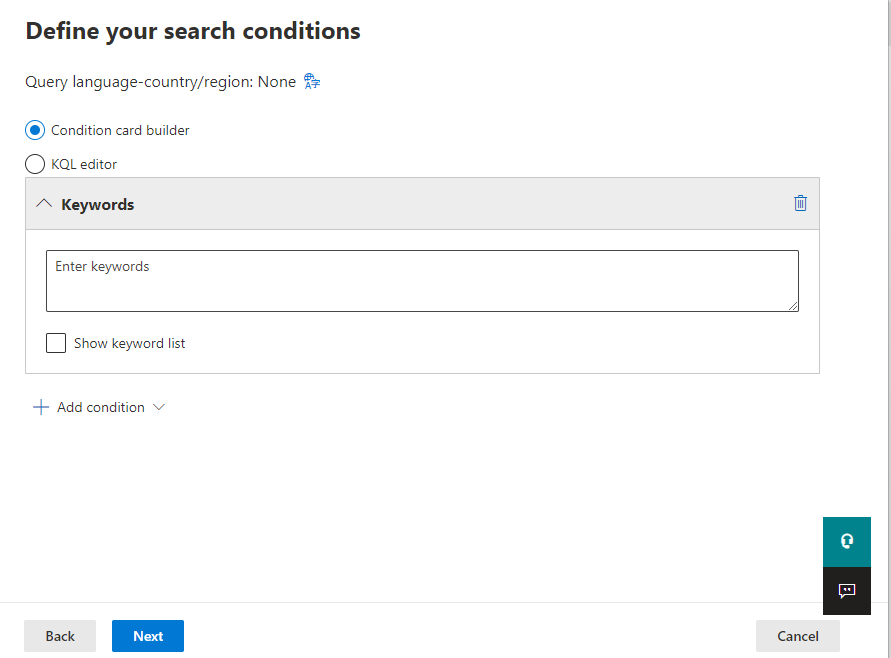
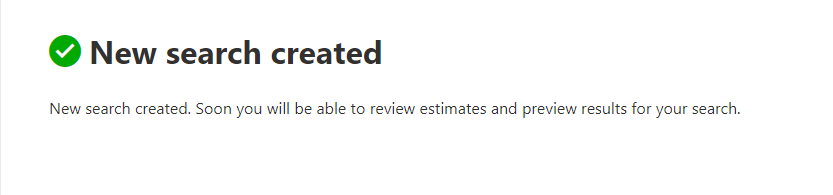
Review and click Submit.
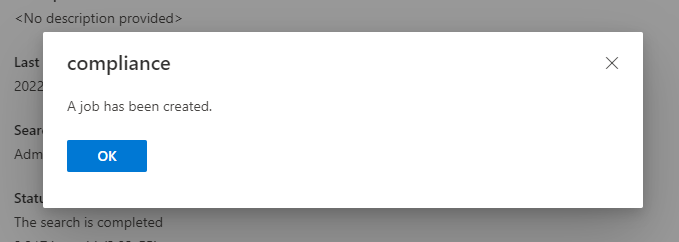
Now under content search, you see the status as Starting.
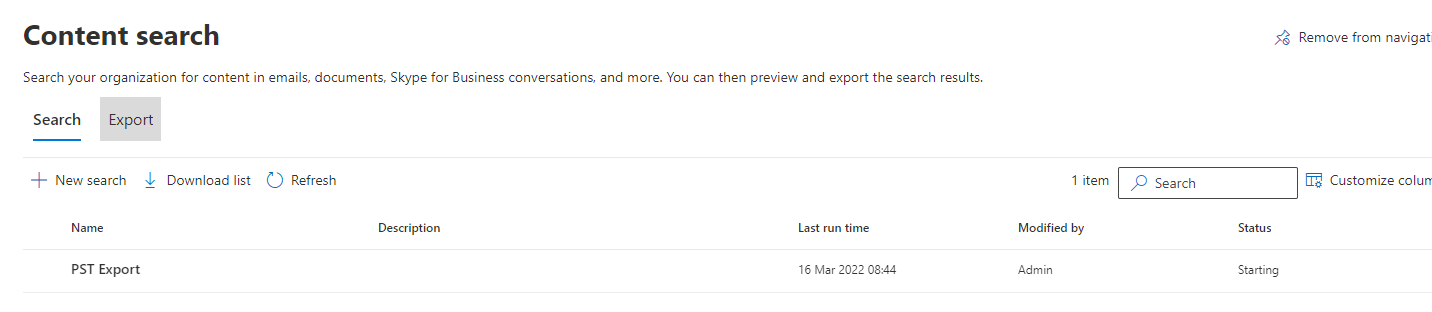
When status changes to Completed, click the search you created.
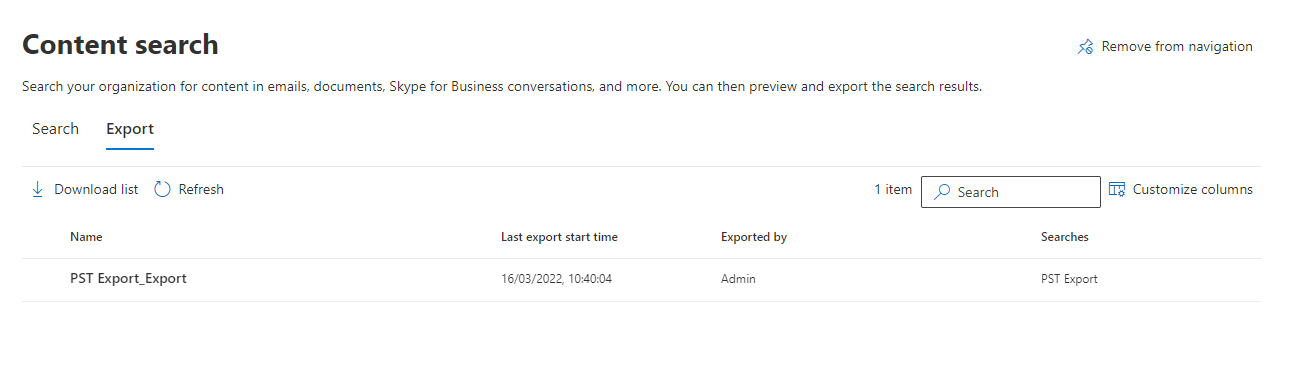
Now click Actions and Export results.
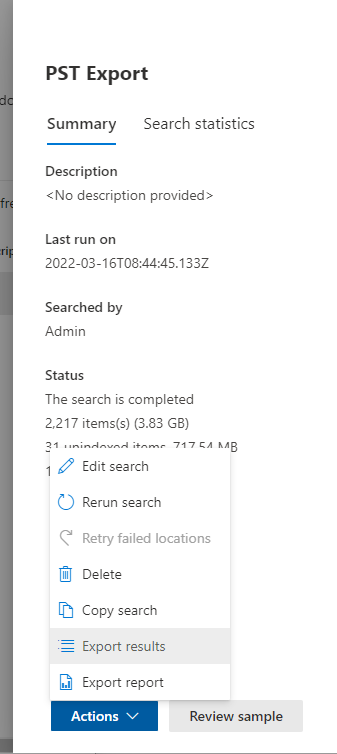
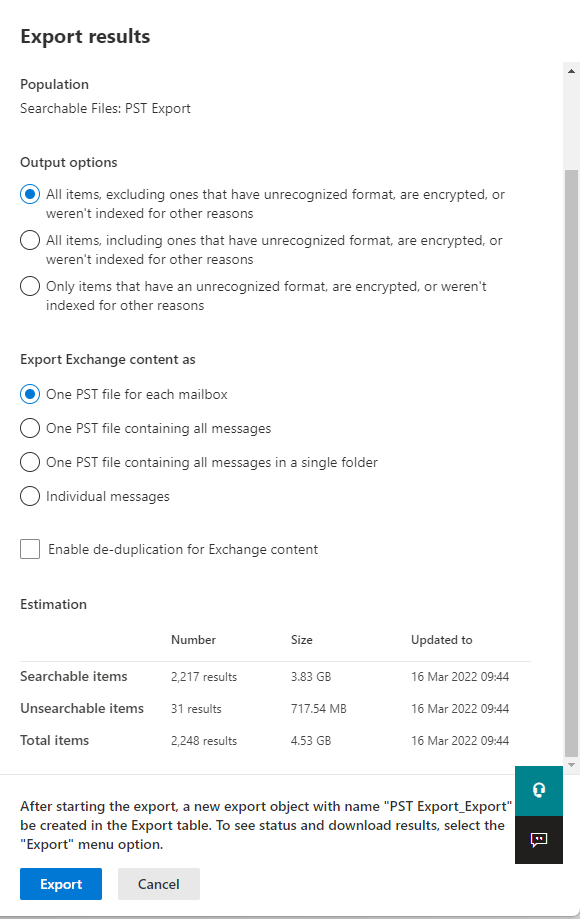
Select your choice of Output options and make sure to choose “One PST file for each mailbox” under “Export Exchange content as”. Click Export.
If you get this error:
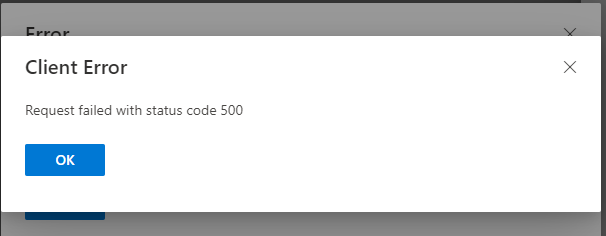
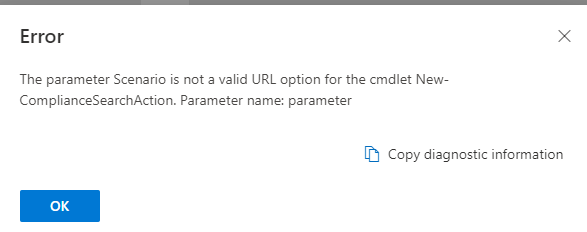
Most probably all your eDiscovery Manager permissions haven’t synced backend. Take a long coffee break. This can take up to an hour.
When the permissions have synced clicking Export results should look like this.
Click the Export menu and select your Export. Now you see its scheduling to prepare the export results for download.
When the status change to Preparing data, wait for that to finish also.
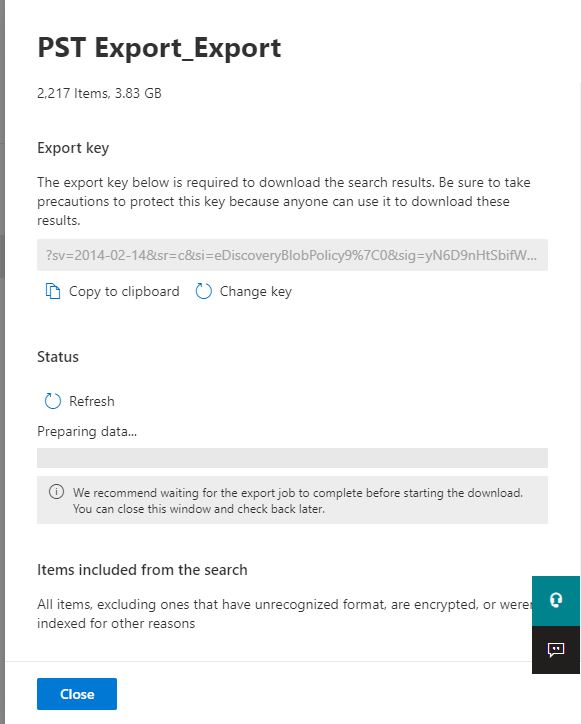
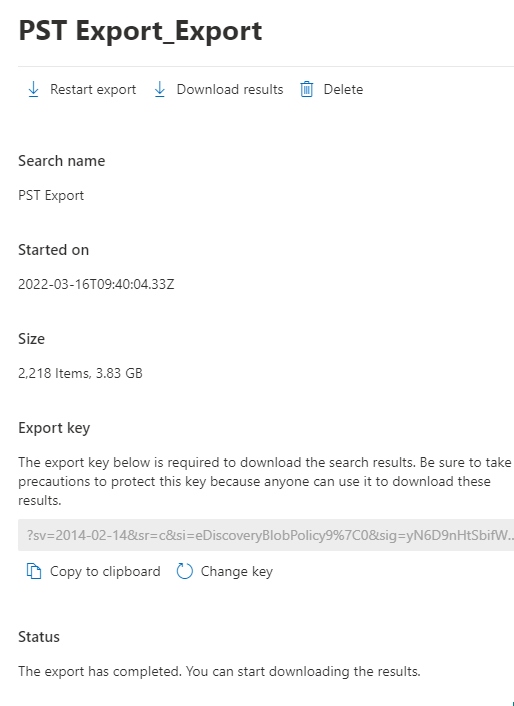
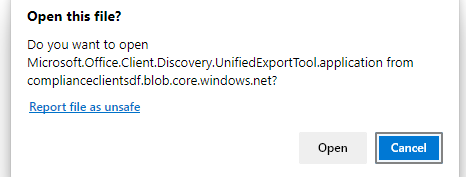
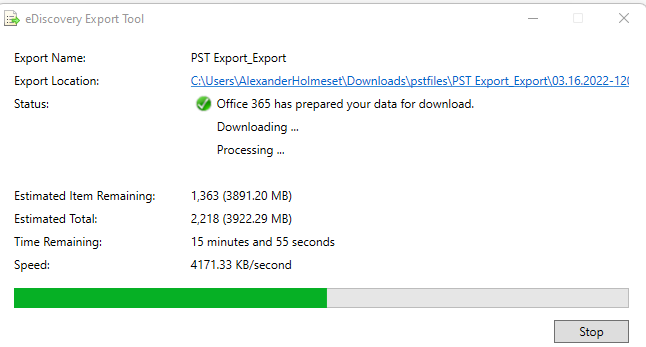
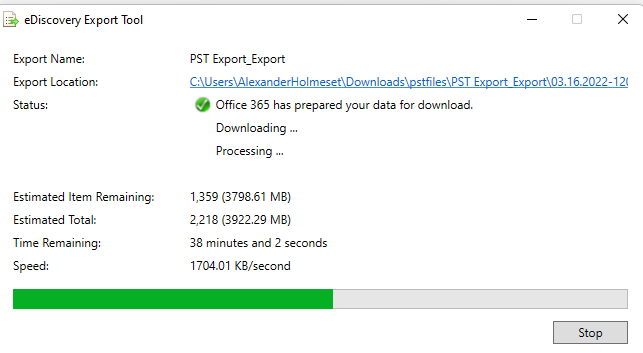
Now that the export is finished, copy the Export key and click Download results.
A PST download tool will now be downloaded. Click Open.
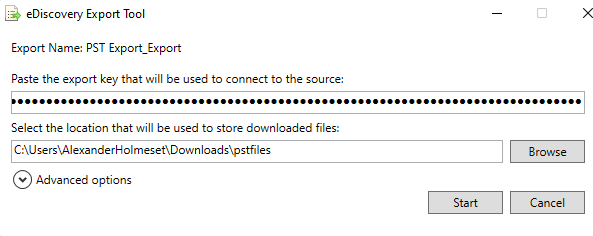
Paste the export key and select where you want to store the PST files on your computer. Click Start.
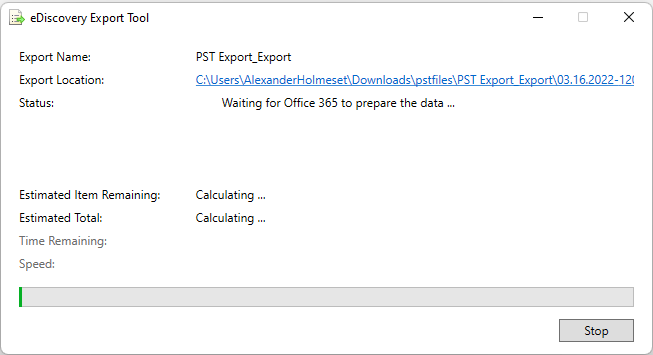
This process can take some time.
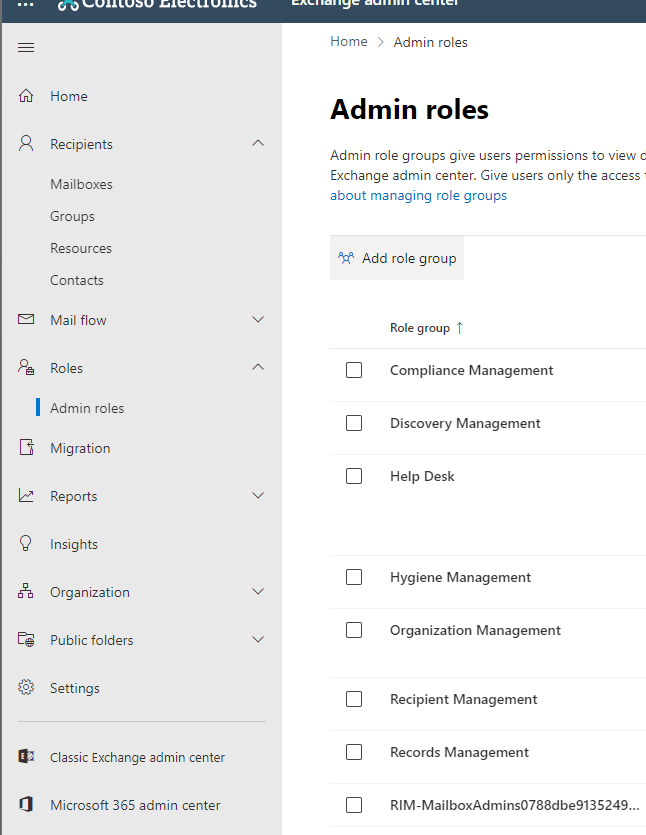
Go to the Exchange portal in the destination tenant and to the Admin Roles menu, click “Add role group”.
Give it a name and click Next.
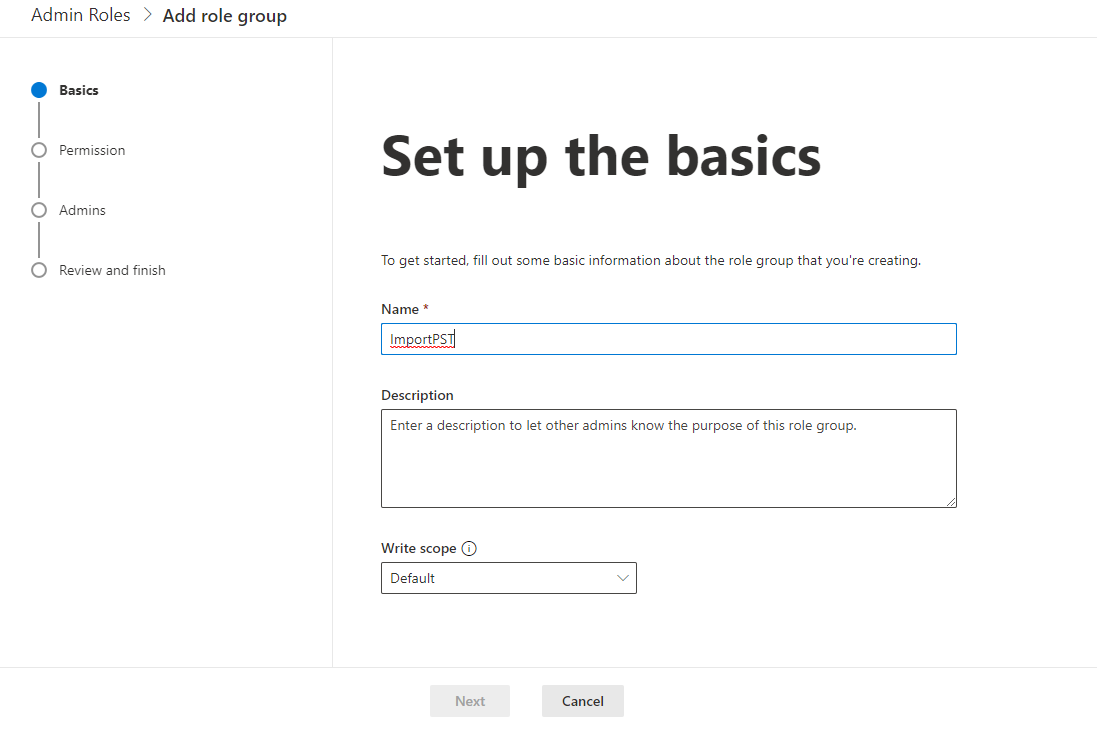
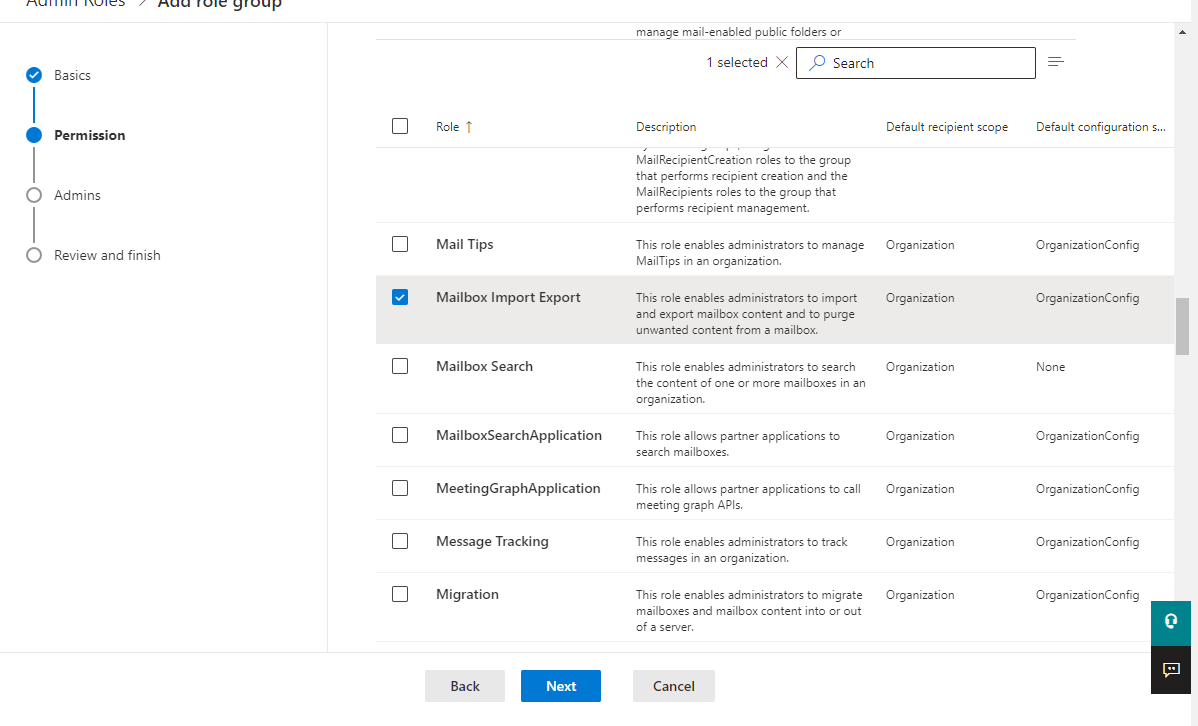
Select Mailbox Import Export role and click Next.
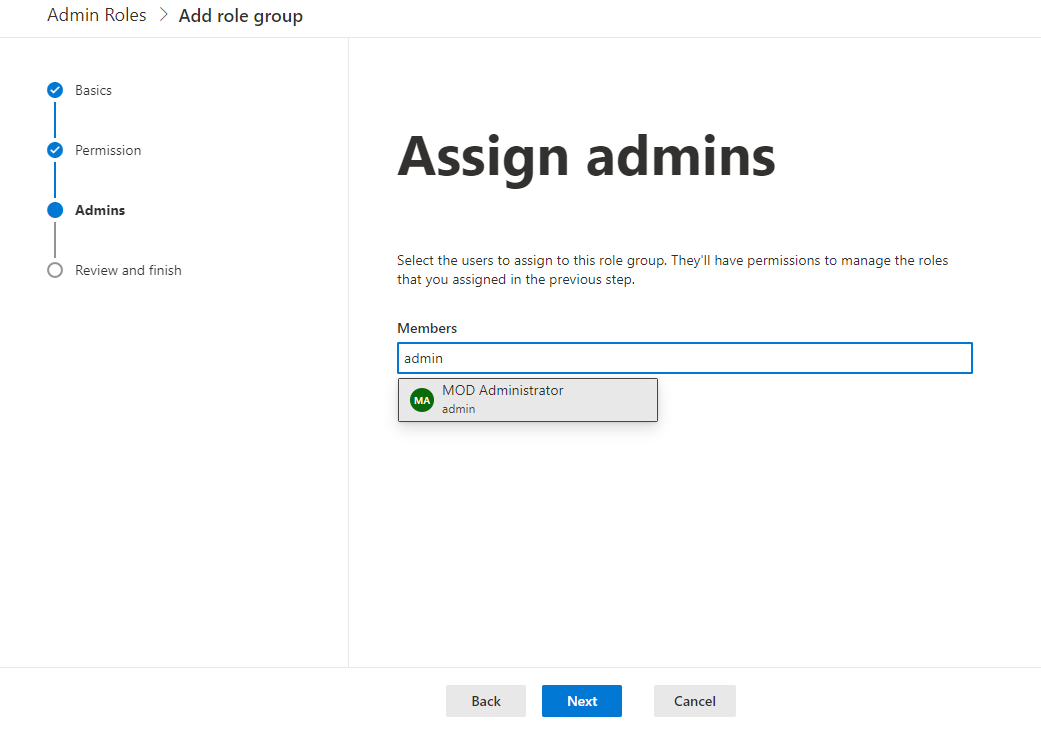
Search for and select the admin user you want to use for this task. Click Next.
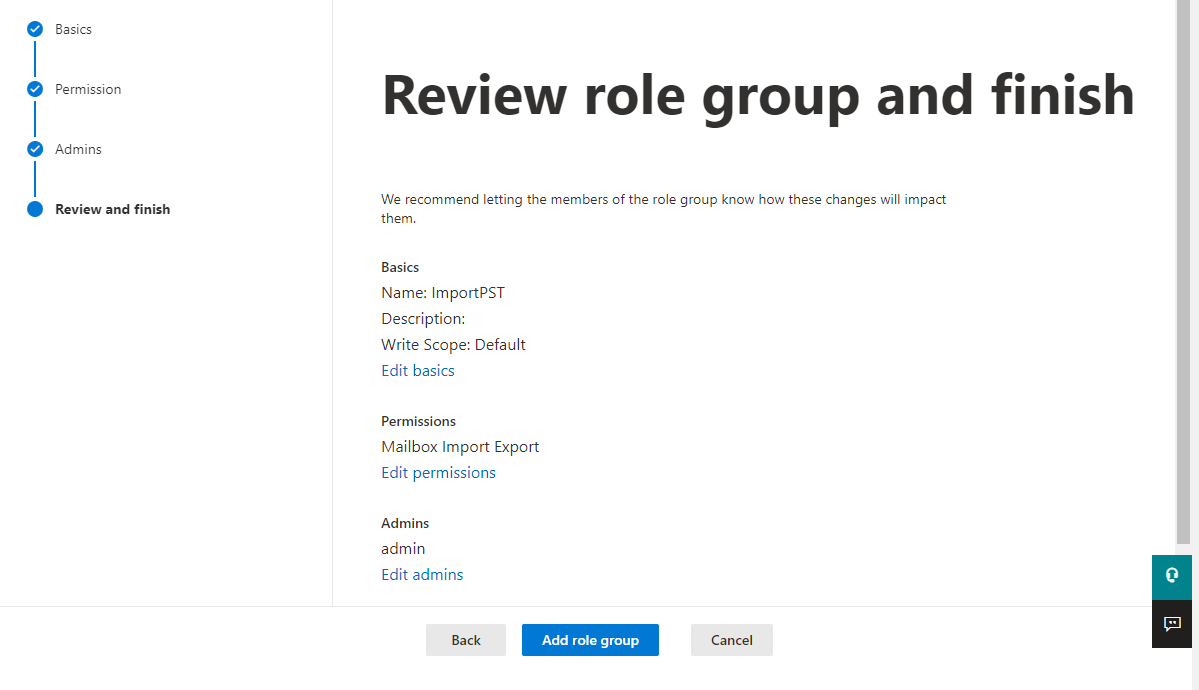
Click Add role group.
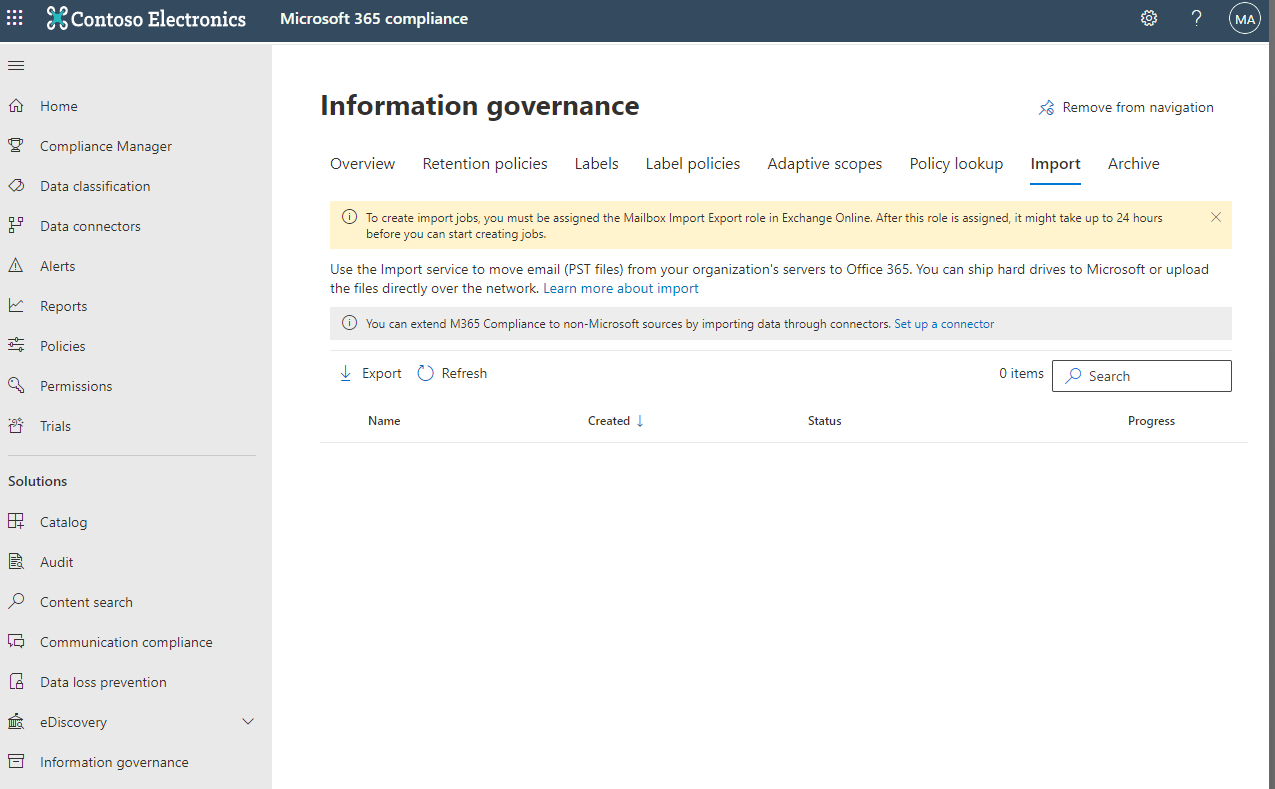
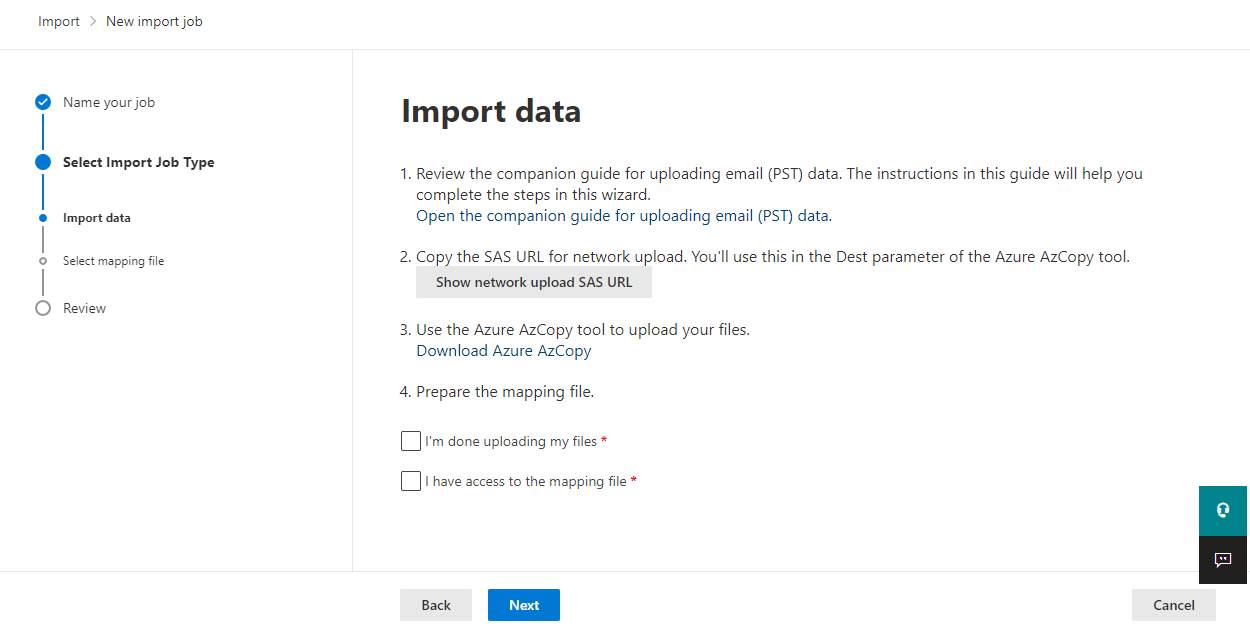
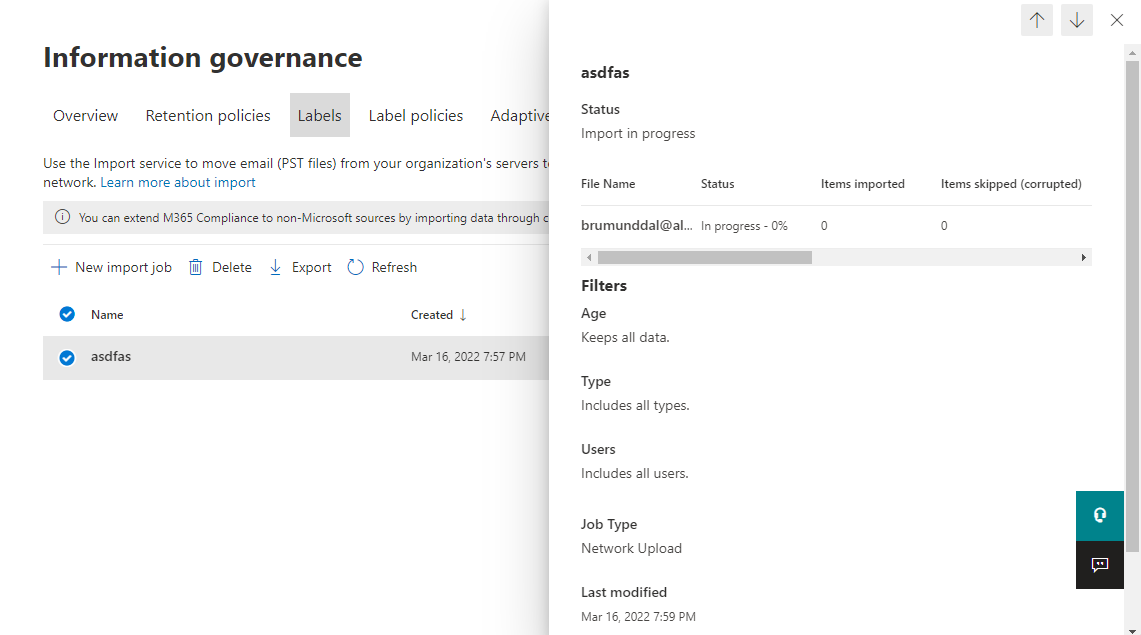
Go to the M365 Compliance portal -> Information governance. Click Import.
As you see by the yellow message, it can take up to 24 hours for the Import
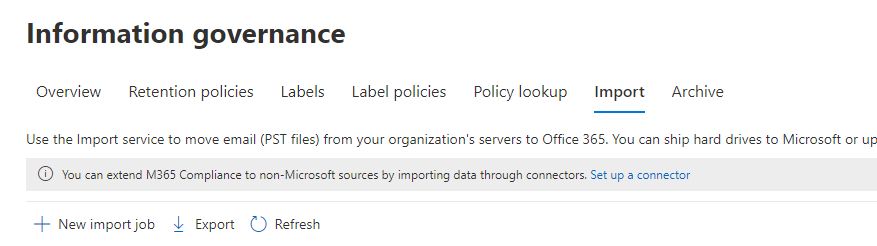
After the permissions have synced, it should look like this. Click New Import Job
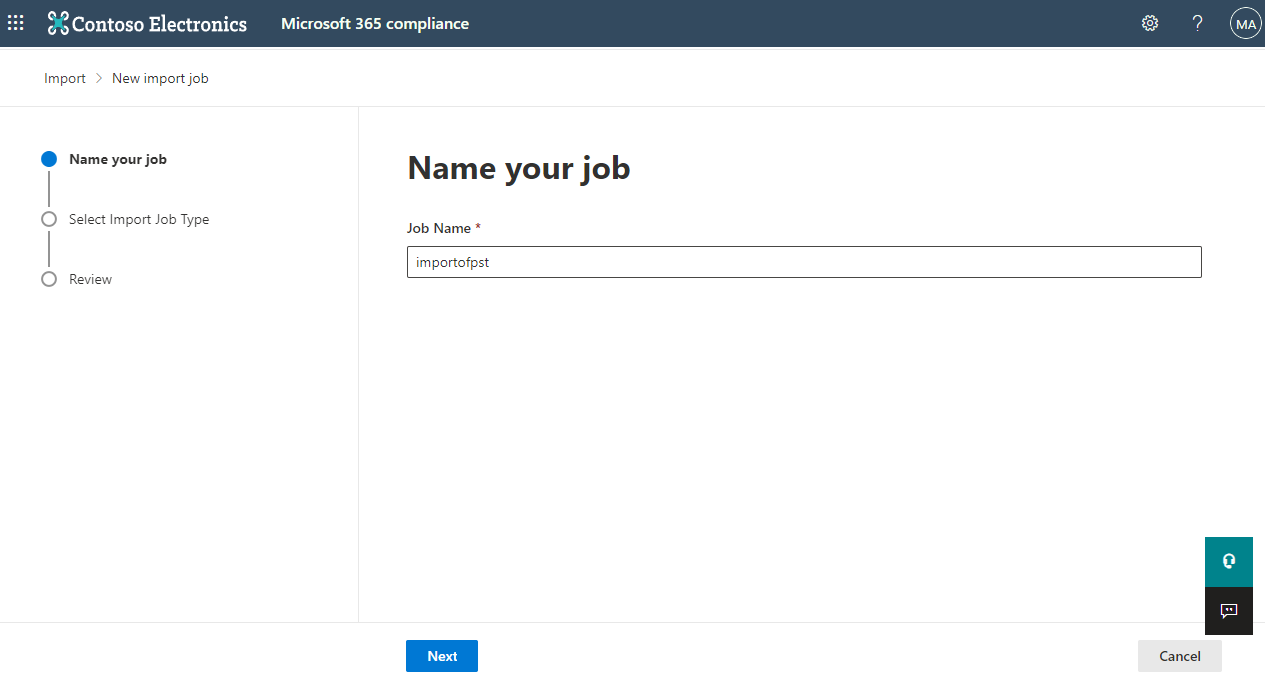
Give it a name and click Next.
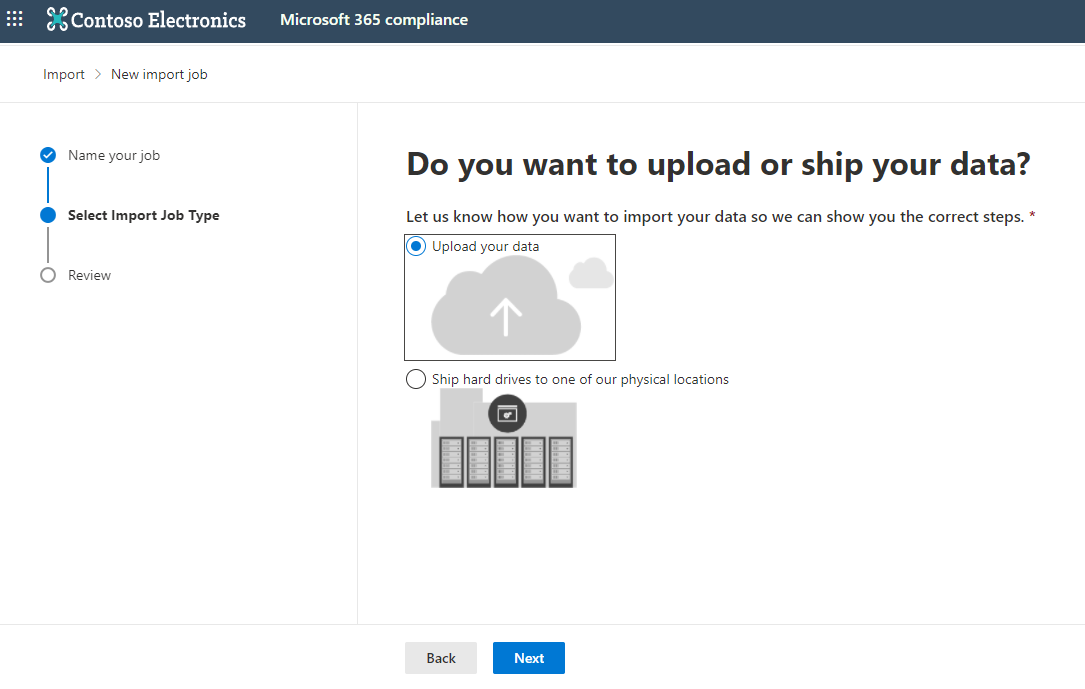
Choose upload your data and click Next.
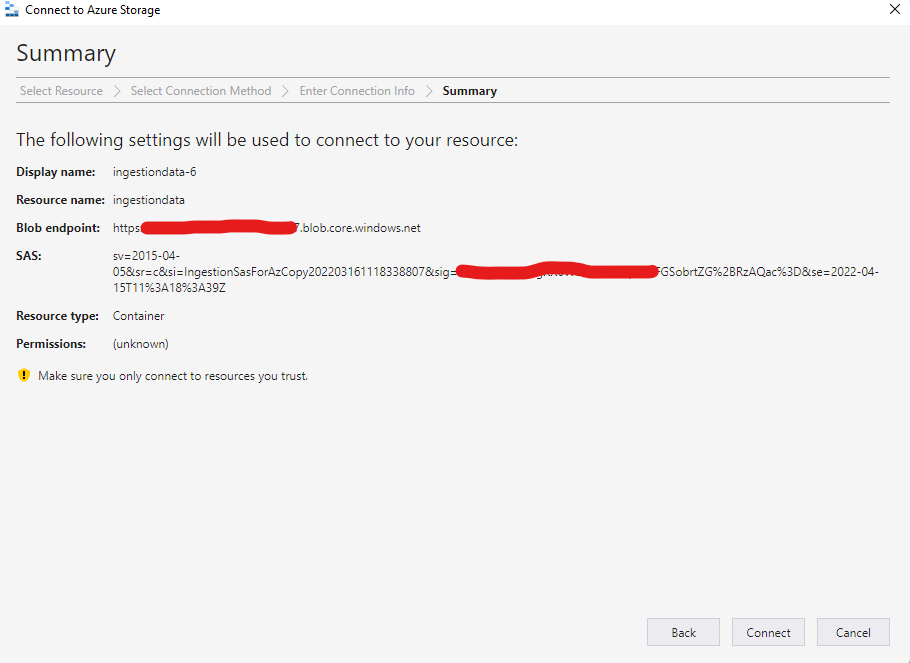
Click “Show network upload SAS URL” and copy the URL.
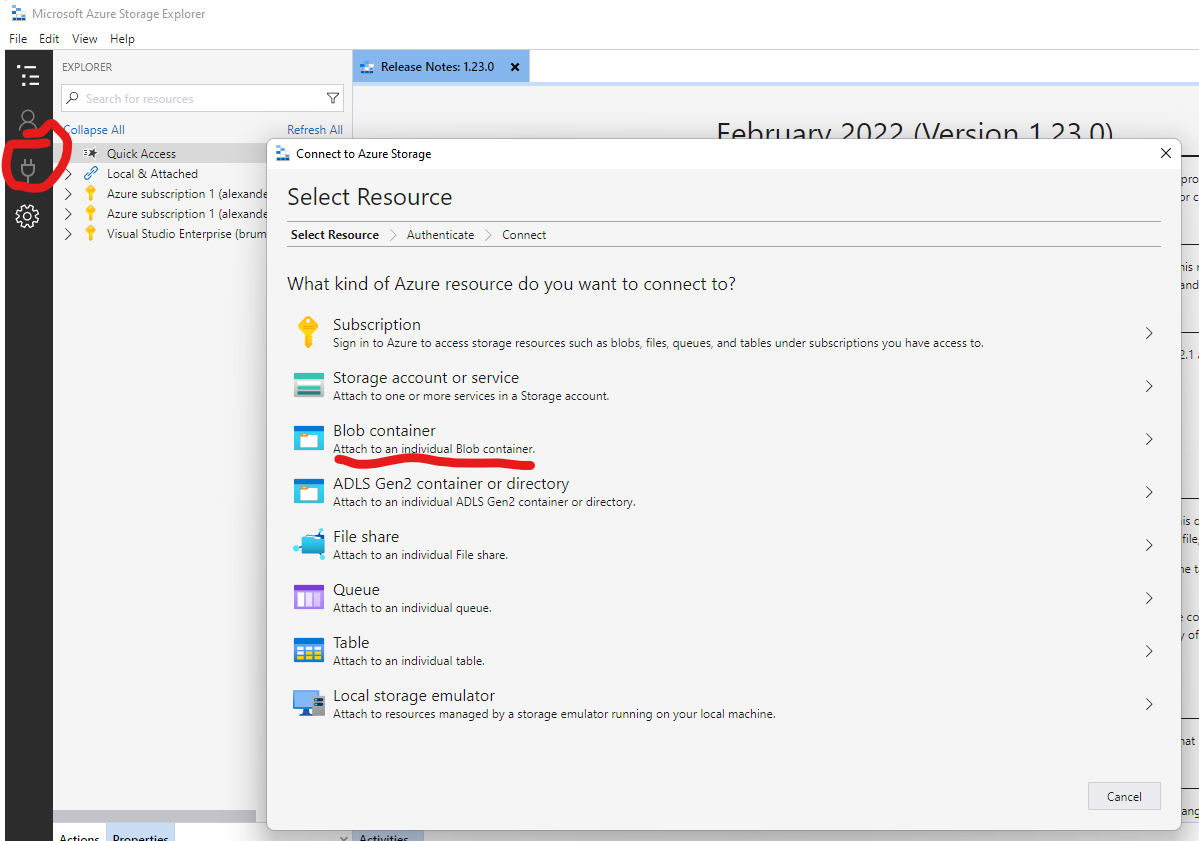
I found it much easier to use Azure Storage Explorer instead of AzCopy.
Download it from here:
https://azure.microsoft.com/nb-no/features/storage-explorer/#overview
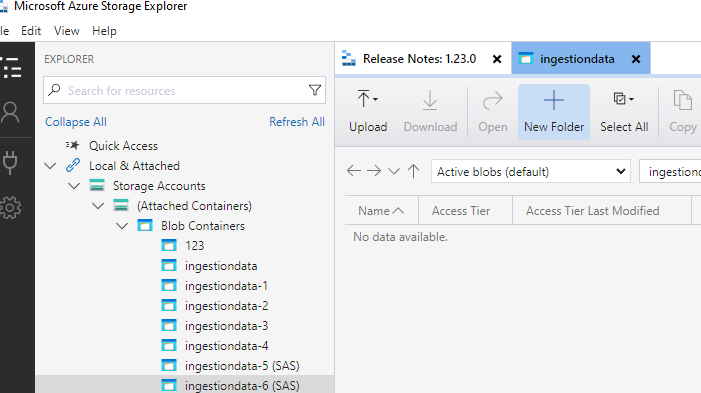
After you have downloaded and installed Azure Storage Explorer, open it.
Click the Power cord and select Blob container.
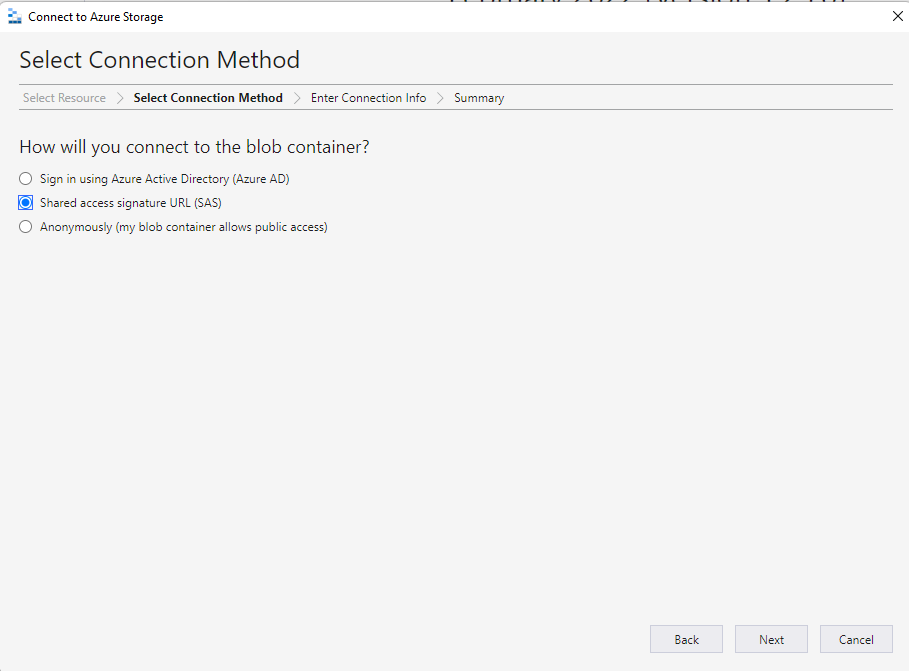
Select “Shared access signature URL(SAS)” and click Next.
Paste your azure SAS URL and click Next.
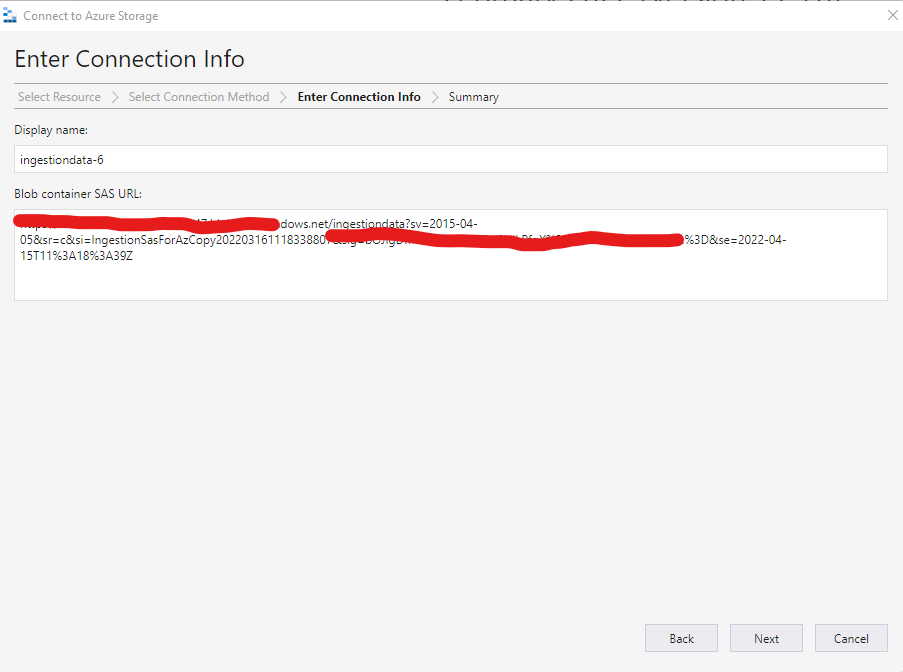
Click Connect.
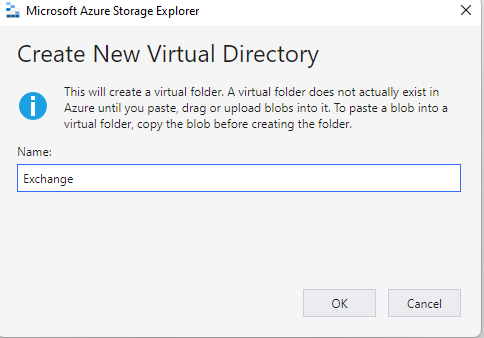
Click New Folder.
Name it Exchange and click OK.
Click Upload and select Upload Files.
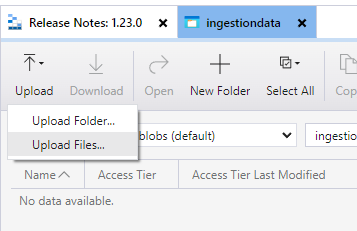
Select the PST files you need and click Upload.
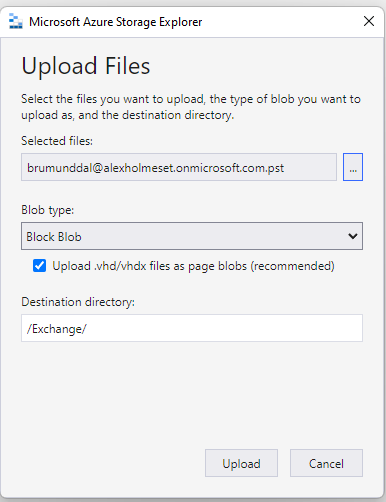
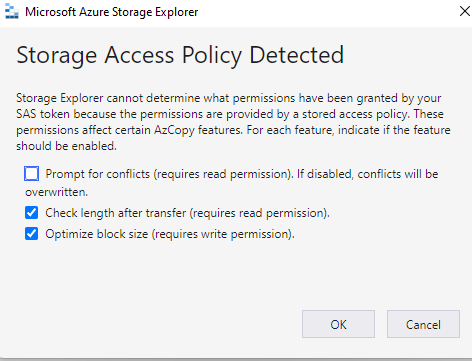
Uncheck “Prompt for conflicts…” and click OK.
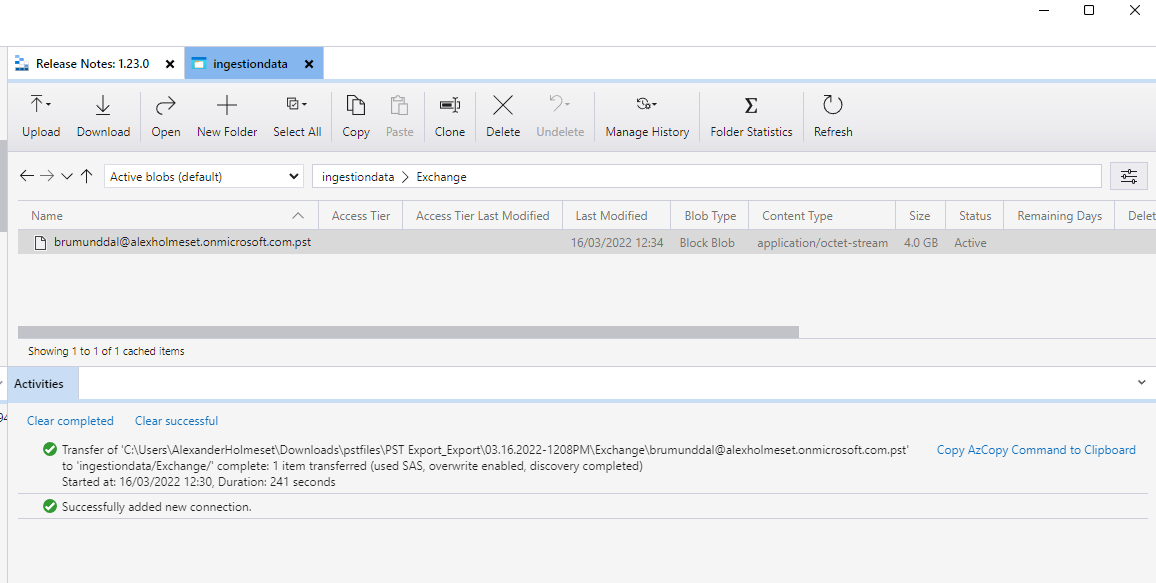
Files are now uploading, wait until it’s complete.

Now we need to generate a CSV file to map the PST files to the correct mailbox. If an exported/downloaded mailbox is larger than 10GB, it will be split into multiple PST files. I have created a short script to generate this CSV mapping file.
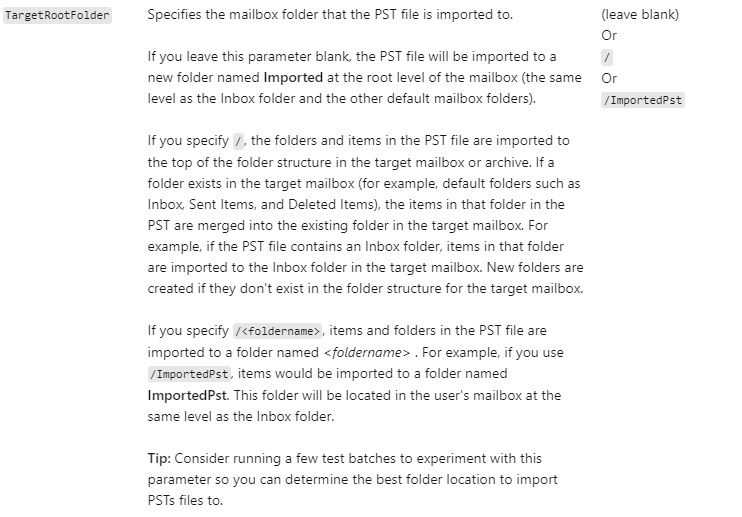
Take a look at this overview from Microsoft Docs that explains how to define the target folder inside the user’s mailbox where you want to store all the emails from the import. In my script I use / so if Inbox,Sent,Delted exists already, they get merged. I guess this depends if you want to keep the old emails separate or mixed with new stuff. The user’s calendar is also imported.
| $PSTfiles = dir 'c:\temp\pstfiles\PST Export_Export\03.16.2022-1208PM\Exchange' | Select-Object name | |
| $filepath = "C:\temp\ImportPSTMapping.csv" | |
| # Header for CSV file | |
| "Workload,FilePath,Name,Mailbox,IsArchive,TargetRootFolder,ContentCodePage,SPFileContainer,SPManifestContainer,SPSiteUrl" | Out-File -Encoding utf8 -FilePath $filepath | |
| foreach($PSTfile in $PSTfiles){ | |
| $mailbox = @() | |
| #First domain is the source domain+.pst | |
| #Seccond domain is the destination domain | |
| $mailbox = (($PSTfile.name).split("-"))[0].Replace("alexholmeset.onmicrosoft.com.pst","M365x04924969.OnMicrosoft.com") | |
| "Exchange,/Exchange,[email protected],[email protected],FALSE,/,,,," | Out-File -Encoding utf8 -FilePath $filepath -Append | |
| } |
Now go back to the “New import job” window in the Compliance Center. Check both boxes and click Next.
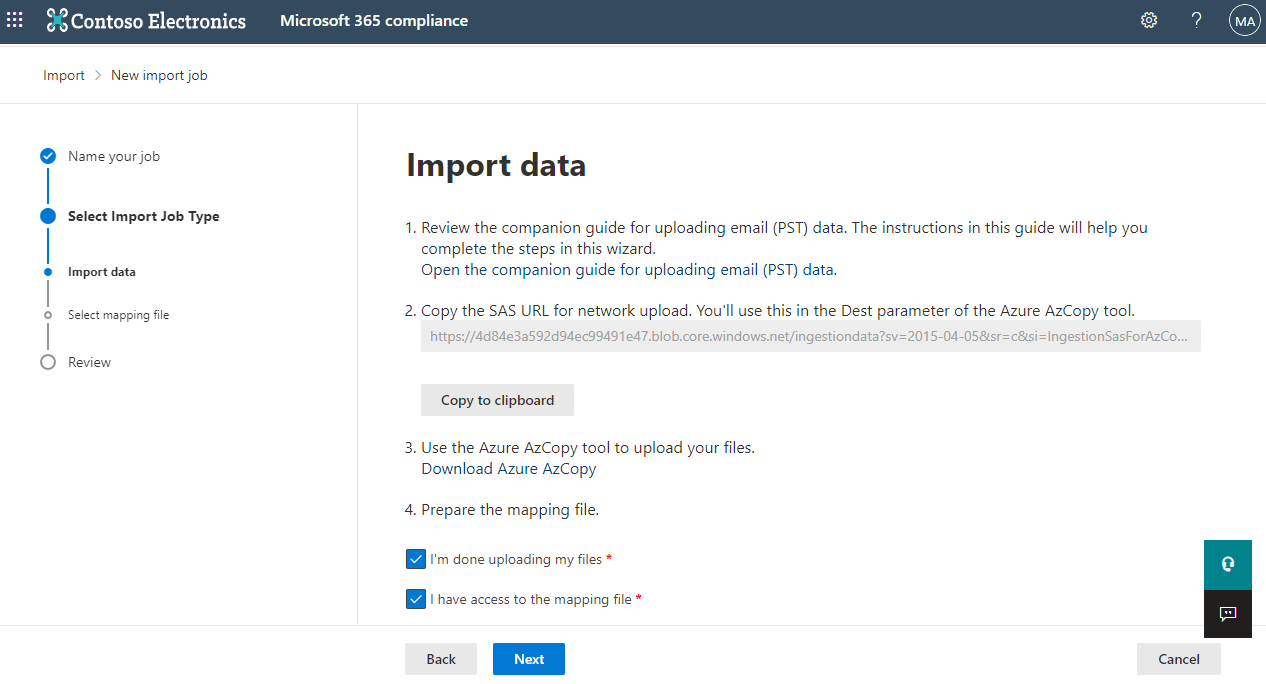
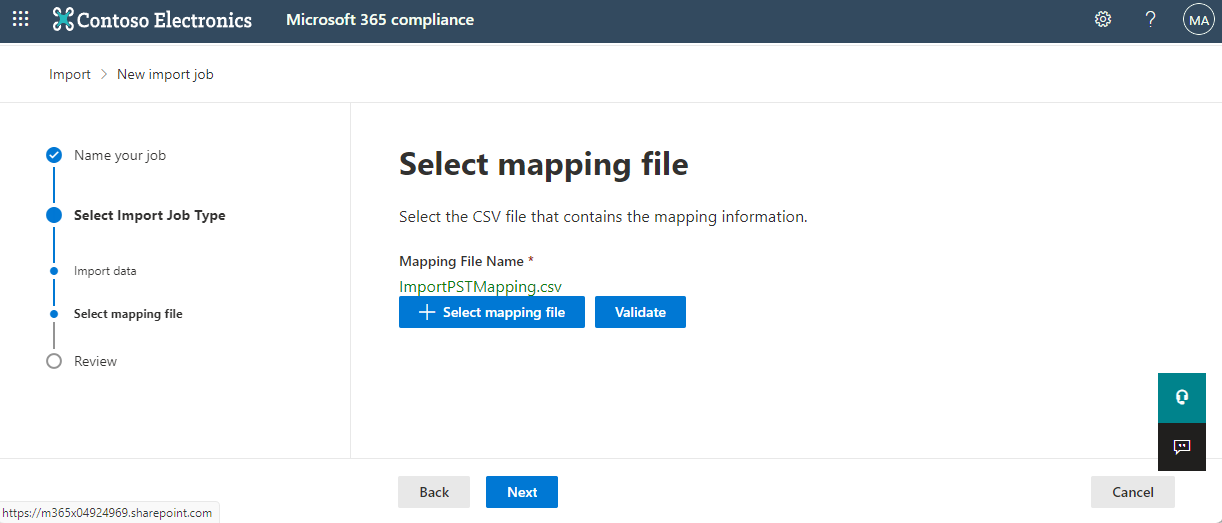
Select the mapping CSV file and click Validate. If the name of the CSV file turns green, all is ok.
Click Next.
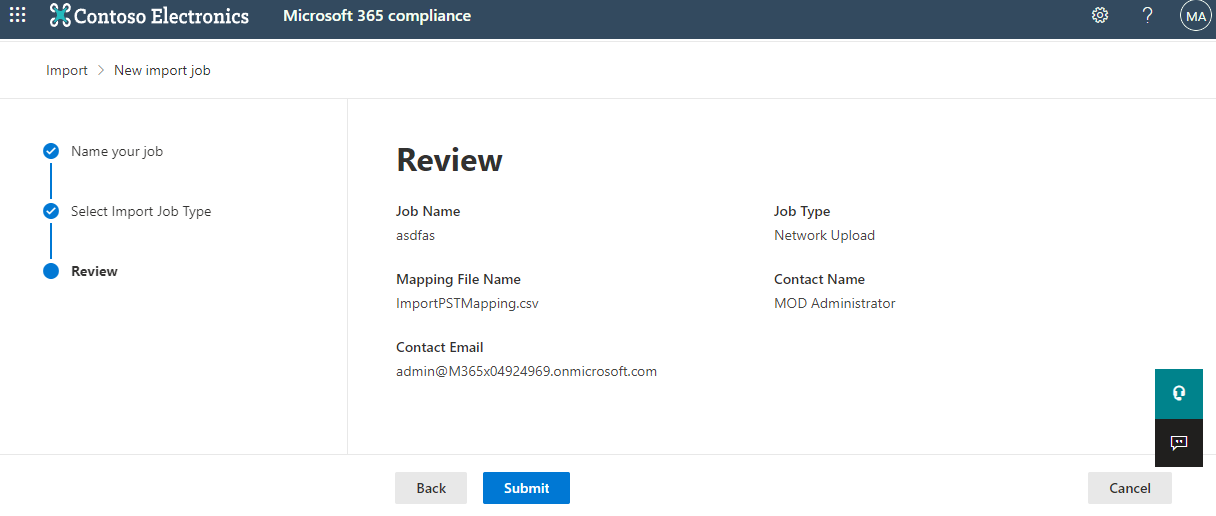
Click Submit.
Take another cup of coffee while waiting for the Analysis to be complete.
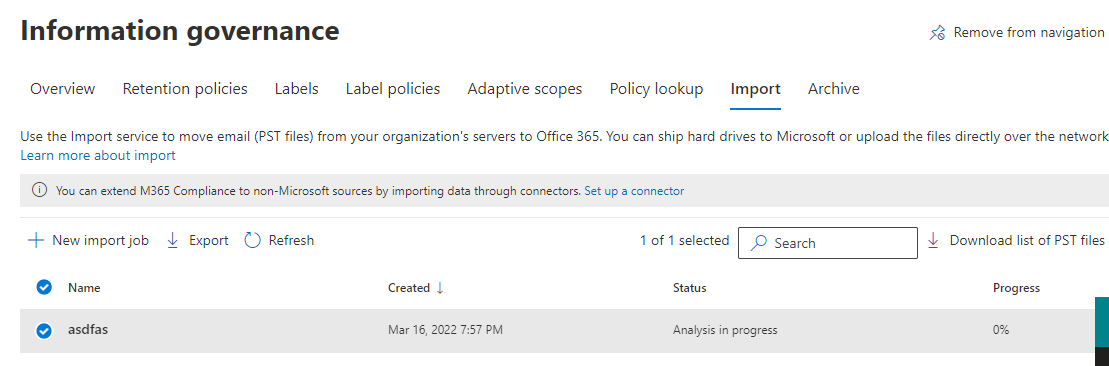
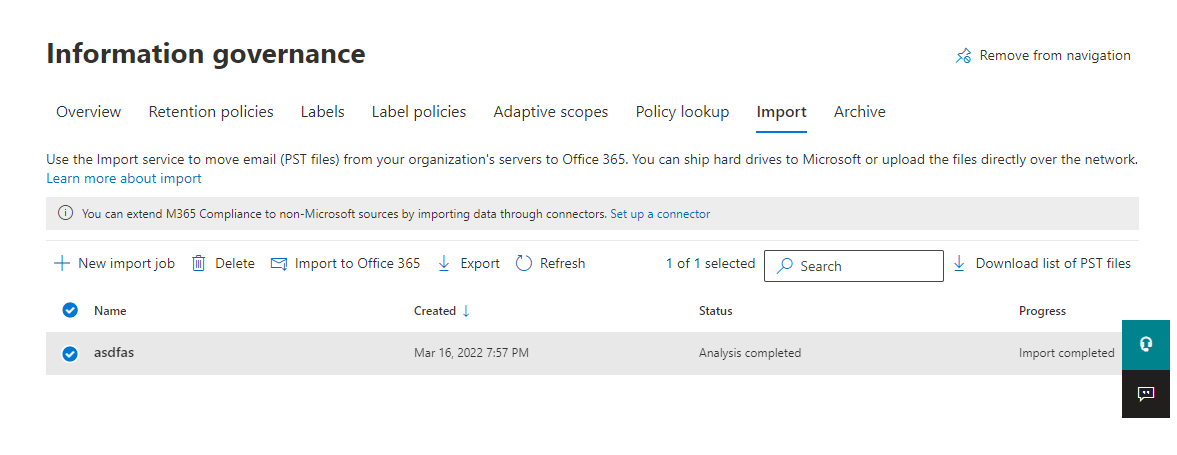
When it says Analysis completed, select the import job and click “Import to Office 365”.
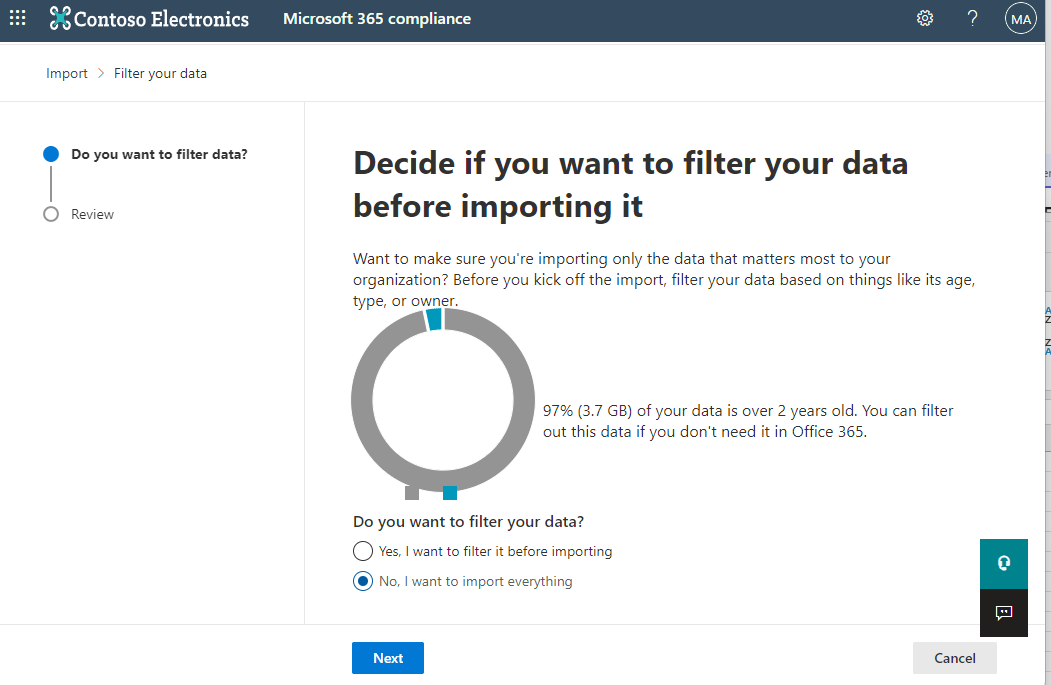
Choose if you want to filter or not, then click Next.
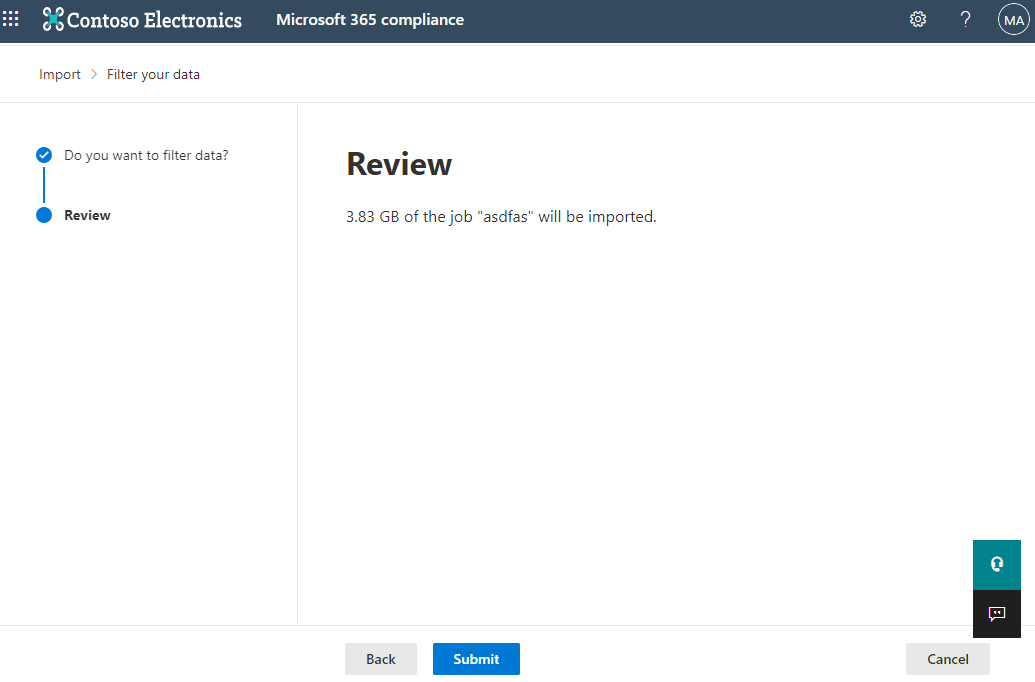
Click Submit.
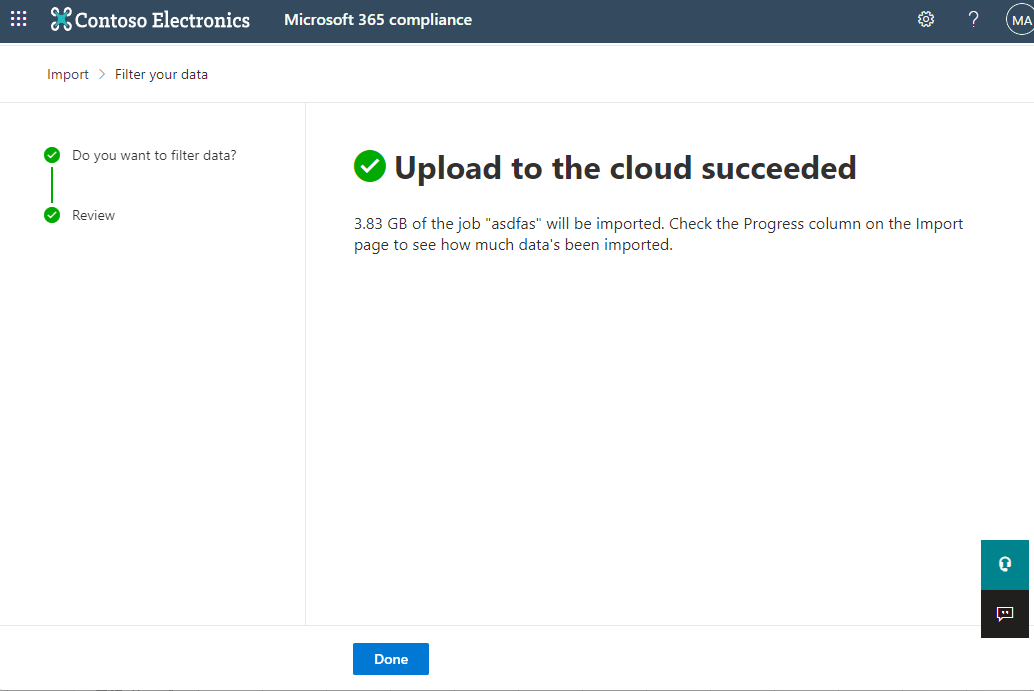
Click Done.
If you click the import job, you can now see that it has started to import the items from the PST file into the user’s mailbox.
While this finishes up, take yet another cup of coffee.
That’s it, now you have migrated the mailboxes to a new tenant!

Hey Alex,
Excellent post. At first i was wondering why we would use the PST export/import option, but then under the linkedIN comment i read the reason and it all made sense 🙂
Small pointer : I guess the last line seems to be left unfinished ? “Thats it, how you have”
Regards,
LikeLike
Thanks, i made a small comment now at the start of the blogpost about why I’m not using Cross Tenant Migration 🙂
haha, looks like I forgot to finish the sentence. Have fixed it now 🙂
LikeLike
[…] Exchange Online Tenant to Tenant migration with free Microsoft methods! Less complex tenant-to-tenant migrations can also be done for free with tools that Microsoft has built into the ecosystem itself. Very good step-by-step guide. […]
LikeLike
Hi,
Very Good blog, i have a question, how do you do for the import just merge the PST inbox with the Destination Inbox and the other folder, cause when i import the user see the pst whith a lot of folder andsubfolders.
Thanks
LikeLike
When i do the import i suggest you import into a specific folder, so it does not clutter the mailbox with multiple folder at root. This solution is also more for when the users already have started using the destination mailbox before migration.
LikeLike
[…] by the article „Exchange Online Tenant to Tenant migration with free Microsoft methods!“ by Alexander Holmset I’ve decided to write this article as a kind of addition to the […]
LikeLike
[…] in a plain pst without the folder structure of the related user mailbox but on the occasion of Alexander Holmesets Blog and the following discussion on Twitter I tried it again and was surprised that it really results […]
LikeLike
[…] The only supported way to get this done is the method described here: Use network upload to import PST files – Microsoft Purview (compliance) | Microsoft Learn. Alex also showed you how to use it in the article which motivated me to write this series. […]
LikeLike
[…] https://alexholmeset.blog/2022/03/16/exchange-online-tenant-to-tenant-migration-with-free-microsoft-… […]
LikeLike