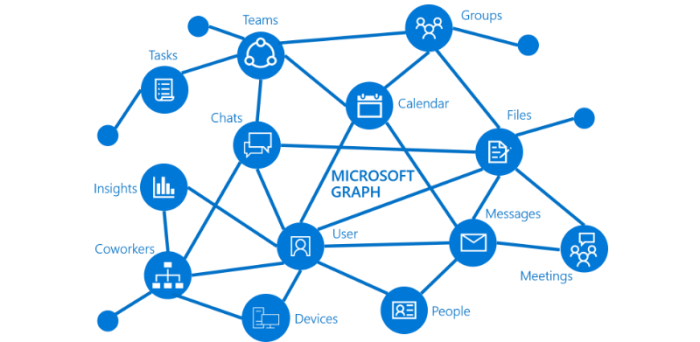
If you haven’t heard about Microsoft Graph API lately, you have probably been living outside of civilization. Graph API is Microsoft’s master communication service that connects and handles data between almost any Azure or Microsoft 365 service in the background. If you are already used to PowerShell and modules, the toolkits you use to work with and automate your cloud environment, the chance that its all Graph API deep inside these modules is big.
If you go here, and scroll down to Developer on the left side. Choose either v1.0 Reference or Beta reference. Here you can see what products and services you can interact with in Graph. These sites contain the URL and request you need for pulling information or update/create new objects like users or groups.
The best way to get started playing around with Graph API before starting with working on the data in PowerShell is to use the Graph Explorer. Graph Explorer is a way to interact with the Graph API in the web browser. You can construct links and requests and test them out. There are a lot of example requests. Even some you can run without being logged in.
The different types of request you can send is GET, POST, PUT, PATCH and DELETE.
You can read more about them here.
So let’s jump right into it and play with the Graph Explorer.
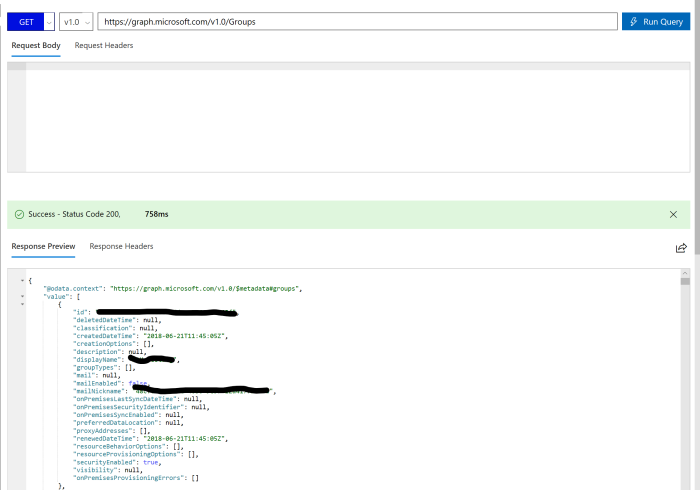
First, we are going to just simply get a list of Groups. Sign in on the left side of the Graph Explorer. To get all groups you simply choose method GET, and enter this URL in the query field: https://graph.microsoft.com/v1.0/Groups
Next, we are going to create a new Office 365 group. We use the same URL but set this to be a POST request as we are creating something. Take a look here to see how to construct the request body.
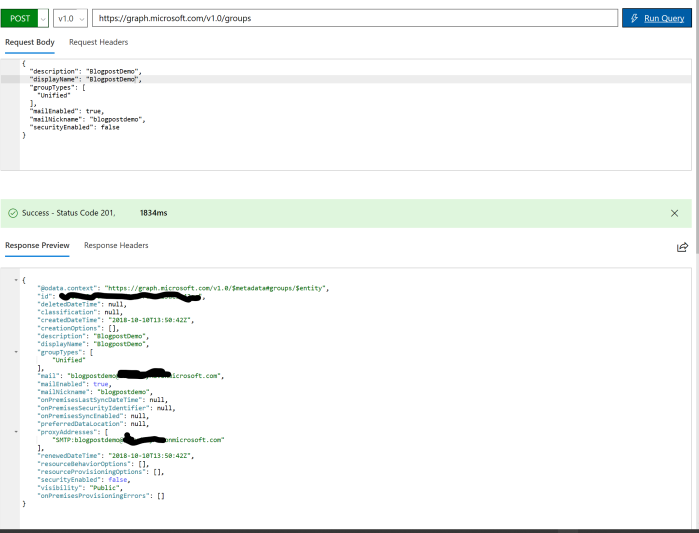
We have now learned how to both gather group info and create new groups through the Graph Explorer. As a little side note, the request bodies are constructed in JSON format.
Next, we will look at how we can do the same operations with Graph by using PowerShell.
First, you need a way to authenticate against Azure AD and get an access token. For production and maybe more granular security, you should also create your own Azure app, but for testing purposes, we will use a known PowerShell client ID.
Here you see the part that gets you an access token and lets you authenticate with Graph:
#User Logon AzureAD module
#Parameters
$clientId = "30055d02-25ec-42d3-9525-7072854ba2fd"
$redirectUri = "https://login.microsoftonline.com/common/oauth2/nativeclient"
$resourceURI = "https://graph.microsoft.com"
$authority = "https://login.microsoftonline.com/common"
#pre requisites
try {
$AadModule = Import-Module -Name AzureADPreview -ErrorAction Stop -PassThru
}
catch {
throw 'Prerequisites not installed (AzureAD PowerShell module not installed)'
}
$adal = Join-Path $AadModule.ModuleBase "Microsoft.IdentityModel.Clients.ActiveDirectory.dll"
$adalforms = Join-Path $AadModule.ModuleBase "Microsoft.IdentityModel.Clients.ActiveDirectory.Platform.dll"
[System.Reflection.Assembly]::LoadFrom($adal) | Out-Null
[System.Reflection.Assembly]::LoadFrom($adalforms) | Out-Null
$authContext = New-Object "Microsoft.IdentityModel.Clients.ActiveDirectory.AuthenticationContext" -ArgumentList $authority
# Get token by prompting login window.
$platformParameters = New-Object "Microsoft.IdentityModel.Clients.ActiveDirectory.PlatformParameters" -ArgumentList "Always"
$authResult = $authContext.AcquireTokenAsync($resourceURI, $ClientID, $RedirectUri, $platformParameters)
$accessToken = $authResult.result.AccessToken
<span id="mce_SELREST_start" style="overflow:hidden;line-height:0;"></span>
$accessToken
Here is a way to authenticate/get a token without a module in a user context:
| # Azure AD OAuth User Token for Graph API | |
| # Get OAuth token for a AAD User (returned as $token) | |
| # Add required assemblies | |
| Add-Type -AssemblyName System.Web, PresentationFramework, PresentationCore | |
| # Application (client) ID, tenant ID and redirect URI | |
| $clientId = "<client id>" | |
| $tenantId = "<tenant id>" | |
| $redirectUri = "https://login.microsoftonline.com/common/oauth2/nativeclient" | |
| # Scope - Needs to include all permisions required separated with a space | |
| $scope = "User.Read.All Group.Read.All" # This is just an example set of permissions | |
| # Random State - state is included in response, if you want to verify response is valid | |
| $state = Get-Random | |
| # Encode scope to fit inside query string | |
| $scopeEncoded = [System.Web.HttpUtility]::UrlEncode($scope) | |
| # Redirect URI (encode it to fit inside query string) | |
| $redirectUriEncoded = [System.Web.HttpUtility]::UrlEncode($redirectUri) | |
| # Construct URI | |
| $uri = "https://login.microsoftonline.com/$tenantId/oauth2/v2.0/authorize?client_id=$clientId&response_type=code&redirect_uri=$redirectUriEncoded&response_mode=query&scope=$scopeEncoded&state=$state" | |
| # Create Window for User Sign-In | |
| $windowProperty = @{ | |
| Width = 500 | |
| Height = 700 | |
| } | |
| $signInWindow = New-Object System.Windows.Window -Property $windowProperty | |
| # Create WebBrowser for Window | |
| $browserProperty = @{ | |
| Width = 480 | |
| Height = 680 | |
| } | |
| $signInBrowser = New-Object System.Windows.Controls.WebBrowser -Property $browserProperty | |
| # Navigate Browser to sign-in page | |
| $signInBrowser.navigate($uri) | |
| # Create a condition to check after each page load | |
| $pageLoaded = { | |
| # Once a URL contains "code=*", close the Window | |
| if ($signInBrowser.Source -match "code=[^&]*") { | |
| # With the form closed and complete with the code, parse the query string | |
| $urlQueryString = [System.Uri]($signInBrowser.Source).Query | |
| $script:urlQueryValues = [System.Web.HttpUtility]::ParseQueryString($urlQueryString) | |
| $signInWindow.Close() | |
| } | |
| } | |
| # Add condition to document completed | |
| $signInBrowser.Add_LoadCompleted($pageLoaded) | |
| # Show Window | |
| $signInWindow.AddChild($signInBrowser) | |
| $signInWindow.ShowDialog() | |
| # Extract code from query string | |
| $authCode = $script:urlQueryValues.GetValues(($script:urlQueryValues.keys | Where-Object { $_ -eq "code" })) | |
| if ($authCode) { | |
| # With Auth Code, start getting token | |
| # Construct URI | |
| $uri = "https://login.microsoftonline.com/$tenantId/oauth2/v2.0/token" | |
| # Construct Body | |
| $body = @{ | |
| client_id = $clientId | |
| scope = $scope | |
| code = $authCode[0] | |
| redirect_uri = $redirectUri | |
| grant_type = "authorization_code" | |
| } | |
| # Get OAuth 2.0 Token | |
| $tokenRequest = Invoke-WebRequest -Method Post -Uri $uri -ContentType "application/x-www-form-urlencoded" -Body $body | |
| # Access Token | |
| $token = ($tokenRequest.Content | ConvertFrom-Json).access_token | |
| } | |
| else { | |
| Write-Error "Unable to obtain Auth Code!" | |
| } |
Here is a way to authenticate/get a token without a module in an application context:
| # Azure AD OAuth Application Token for Graph API | |
| # Get OAuth token for a AAD Application (returned as $token) | |
| # Application (client) ID, tenant ID and secret | |
| $clientId = "<client id>" | |
| $tenantId = "<tenant id>" | |
| $clientSecret = '<secret>' | |
| # Construct URI | |
| $uri = "https://login.microsoftonline.com/$tenantId/oauth2/v2.0/token" | |
| # Construct Body | |
| $body = @{ | |
| client_id = $clientId | |
| scope = "https://graph.microsoft.com/.default" | |
| client_secret = $clientSecret | |
| grant_type = "client_credentials" | |
| } | |
| # Get OAuth 2.0 Token | |
| $tokenRequest = Invoke-WebRequest -Method Post -Uri $uri -ContentType "application/x-www-form-urlencoded" -Body $body -UseBasicParsing | |
| # Access Token | |
| $token = ($tokenRequest.Content | ConvertFrom-Json).access_token |
Thanks to Lee Ford for the two approaches to getting a token without a module.
To read more about registering your own Azure application you can see the steps in this blog post: Trigger Azure Automation with a Teams team request Form!
To query Graph and create a PowerShell variable with groups data, you run the following “code”:
$apiUrl = 'https://graph.microsoft.com/v1.0/Groups/'
$Data = Invoke-RestMethod -Headers @{Authorization = "Bearer $accessToken"} -Uri $apiUrl -Method Get
$Groups = ($Data | select-object Value).Value
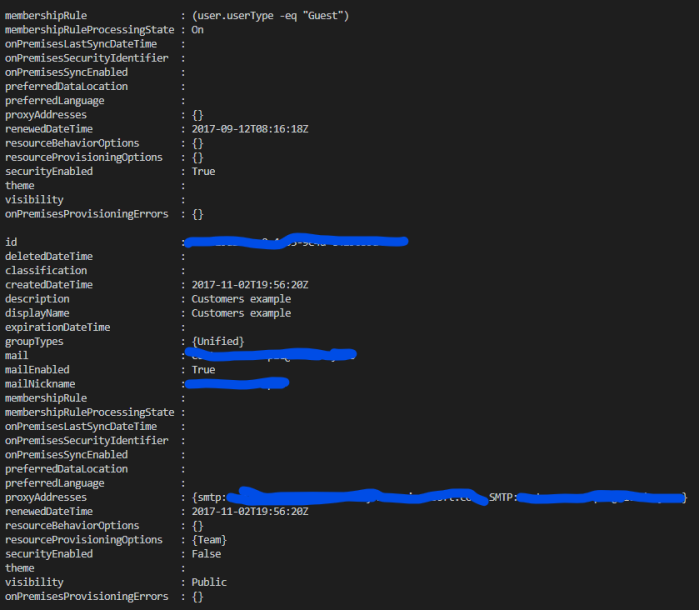
We can now take a look at the content of one of the groups in the $Groups variable:
Now we know how to create a request to get information from Graph into PowerShell. The next step is to create a POST query and learn how to construct a JSON body in PowerShell so we can create a new group. The trick is to create a variable where you put @’ at the top of the query and ‘@ at the bottom. This makes the whole request into one large ‘text’, and will not give you a lot of different errors as JSON uses different formatting than PowerShell. You can also use double quotes @” “@, then you can also put variables inside your request.
$body = @'
{
  "description": "Self help community for library",
  "displayName": "Library Assist",
  "groupTypes": [
    "Unified"
  ],
  "mailEnabled": true,
  "mailNickname": "library",
  "securityEnabled": false
}
'@

$apiUrl = 'https://graph.microsoft.com/v1.0/groups'
$Data = Invoke-RestMethod -Headers @{Authorization = "Bearer $accessToken"} -Uri $apiUrl -Body $body -Method Post -ContentType 'application/json'
Now you have learned whats needed to get a jump start in using Graph API, and leveraging the power in PowerShell at the same time. As Microsoft has a high focus on Graph, I think there will be a lot more products you can work within the future through this API.

[…] Getting started with Graph API and PowerShell […]
LikeLike
Great Post!
For some reason it was not working like that for me, i had to make 3 minor changes:
In the credential line I replaced this:
$AADCredential = New-Object “Microsoft.IdentityModel.Clients.ActiveDirectory.UserCredential” -ArgumentList $Office365Username,$SecurePassword
with this:
$AADCredential = New-Object “Microsoft.IdentityModel.Clients.ActiveDirectory.UserPasswordCredential” -ArgumentList $Office365Username,$SecurePassword
In the $authresult I changed this:
$authResult = $authContext.AcquireToken($resourceURI, $clientId,$AADCredential)
with this:
$authResult = [Microsoft.IdentityModel.Clients.ActiveDirectory.AuthenticationContextIntegratedAuthExtensions]::AcquireTokenAsync($authContext, $resourceURI, $clientid, $AADCredential);
and finally this:
$accessToken = $authResult.AccessToken
with:
$accessToken = $authResult.result.AccessToken
LikeLike
Thanks.
Strange one, could it be that you have a different module version or version of PowerShell? I only tested with modern auth logon popup, not by stating username/password in the script.
LikeLike
Ok, now it works. I made some cosmetics on the assembly loading too.
#based on https://github.com/microsoftgraph/powershell-intune-samples/blob/master/Authentication/Auth_From_File.ps1
#Parameters
$clientId = “1950a258-227b-4e31-a9cf-717495945fc2”
$redirectUri = “urn:ietf:wg:oauth:2.0:oob”
$resourceURI = “https://graph.microsoft.com”
$authority = “https://login.microsoftonline.com/common”
$authContext = New-Object “Microsoft.IdentityModel.Clients.ActiveDirectory.AuthenticationContext” -ArgumentList $authority
#$Office365Username=’user@domain’
#$Office365Password=’VeryStrongPassword’
#pre requisites
try {
$AadModule = Import-Module -Name AzureAD -ErrorAction Stop -PassThru
}
catch {
throw ‘Prerequisites not installed (AzureAD PowerShell module not installed)’
}
$adal = Join-Path $AadModule.ModuleBase “Microsoft.IdentityModel.Clients.ActiveDirectory.dll”
$adalforms = Join-Path $AadModule.ModuleBase “Microsoft.IdentityModel.Clients.ActiveDirectory.Platform.dll”
[System.Reflection.Assembly]::LoadFrom($adal) | Out-Null
[System.Reflection.Assembly]::LoadFrom($adalforms) | Out-Null
##option without user interaction
if (([string]::IsNullOrEmpty($Office365Username) -eq $false) -and ([string]::IsNullOrEmpty($Office365Password) -eq $false))
{
$SecurePassword = ConvertTo-SecureString -AsPlainText $Office365Password -Force
#Build Azure AD credentials object
$AADCredential = New-Object “Microsoft.IdentityModel.Clients.ActiveDirectory.UserPasswordCredential” -ArgumentList $Office365Username,$SecurePassword
# Get token without login prompts.
$authResult = [Microsoft.IdentityModel.Clients.ActiveDirectory.AuthenticationContextIntegratedAuthExtensions]::AcquireTokenAsync($authContext, $resourceURI, $clientid, $AADCredential);
}
else
{
# Get token by prompting login window.
$platformParameters = New-Object “Microsoft.IdentityModel.Clients.ActiveDirectory.PlatformParameters” -ArgumentList “Always”
$authResult = $authContext.AcquireTokenAsync($resourceURI, $ClientID, $RedirectUri, $platformParameters)
}
$accessToken = $authResult.result.AccessToken
LikeLike
Awesome job, thanks! Il also test it and update the blogpost after i get back from PowerShell Conference Asia in Singapore. If you have any other questions just reach out to me on twitter: https://twitter.com/AlexHolmeset
LikeLike
That’s the issue then. I only tested it with the user and pass parameters because I needed to automate.
The Microsoft.IdentityModel.Clients.ActiveDirectory.UserCredential is used for integrated authentication while the Microsoft.IdentityModel.Clients.ActiveDirectory.UserPasswordCredential is used for passing user and password.
merging the changes should do the trick. I’ll look into it and let you know
LikeLiked by 1 person
Cool, thanks.
LikeLike
Hi Is this issue resolved? could you please share the working code with me, i am looking for a script which will not prompt me for inputs. As we are planning to automate this. So please help me
LikeLike
If you take a look here, you can see how to create a application secret instead, not connected to a user. You dont need the whole article, just some bita from it:
LikeLike
[…] to the Graph API via PowerShell. The connection code is from a more thorough blog post by my MVP colleague Alexander Holmeset. $clientId is the client ID we copied in the […]
LikeLike
[…] Read about how I work with Graph trough PowerShell here. […]
LikeLike
[…] a look here if you don’t know how to get an access token for Graph API requests in PowerShell. Also, […]
LikeLike
[…] you have started using Graph API through PowerShell and gotten pretty great at it. Then one day while writing a script and doing stuff you swear have […]
LikeLike
[…] for a wile have to use invoke-RestMethod or Invoke-WebRequest to do the requests as I have in my “Getting started with Graph API and PowerShell” blog post. If you already did not know, many of Microsoft’s PowerShell modules have started […]
LikeLike
[…] you use for doing Graph API calls in PowerShell. If this is new to you, take a look at my ‘Getting started with Graph API and PowerShell’ post. Copy the request URL and the authorization token, and open your favorite PowerShell editor and […]
LikeLike
[…] Short blogpost today with a script that exports the root contact list or a specific folder of a users Exchange Online mailbox. You need an Azure application with the app right Contact.Read. If you don’t know how to use Graph API in PowerShell and create an Azure app, take a look here at my blogpost on the topic: Getting started with Graph API and PowerShell […]
LikeLike
[…] You need an Azure App registration in both tenants with the application rights Calendar.ReadWrite and User.Read.All to run this script. Take a look here on how to register a Azure Application: Getting started with Graph API and PowerShell […]
LikeLike